Setting up J Codes
Updated May 1st, 2024
Who is this guide for?
Case Management Supervisors and System Supervisors
This guide will show you how to set up J Codes for use in Osprey
J Codes allow further categorisation of charges and expenses incurred during litigation, based on the experience of the litigator. This guide will demonstrate how to set up Fee Earners ready to use J Codes.
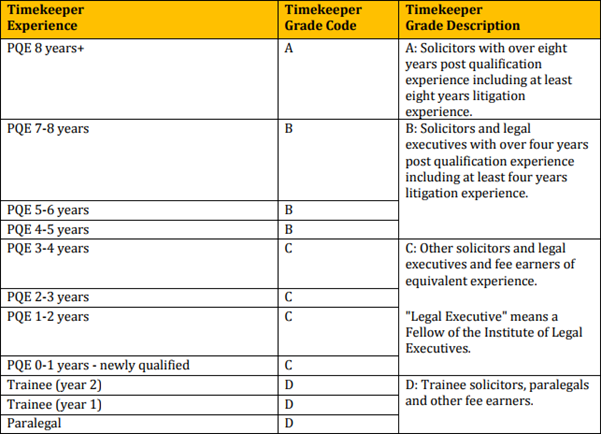
Please see the bottom of this page for a table listing the grade codes and description to assist you in selecting the relevant grade.
Setting up Fee Earners
To accurately record Tasks/Phase codes, you will need to assign the litigator a grading.
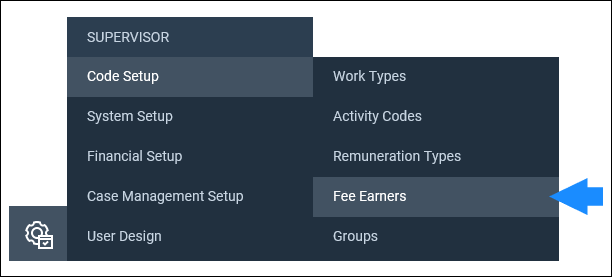
Navigate to Supervisor > Code Setup > Fee Earners.
When you add a new fee earner or edit an existing one, you will have a choice to assign a grade at the bottom of the page.
You will also have to enter the start and end dates.

Once completed, the fee earner will be able to record time against the grade assigned to them.
If several fee earners will be using the time recording,
Grading Table
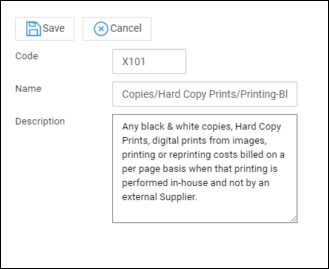
Configure Codes
Further Task Codes, Activity Codes and Expense Codes can be set up by a system supervisor, as well as amendments to exisiting Codes.
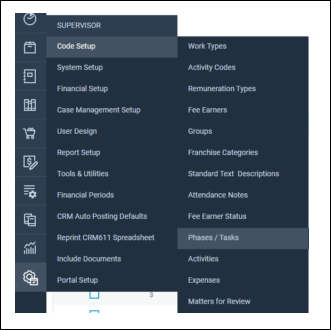
Phase/Task Codes
Task codes define the task being performed, and can be mapped to one of ten phases.
When adding or editing a task code, you can select which Phase is to be mapped to.

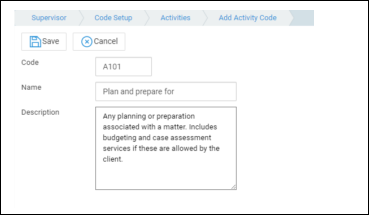
Activity Codes
Fee Earners can assign Activity codes to their time recording. Supervisors can also add new activity codes if required.
Expenses Codes
Much like Activity Codes, exisiting Expenses codes can be amended, or additional Expense Codes can be added.