Configure Your Browser: Internet Explorer
Updated Sep 22nd, 2021
Who is this guide for?
Any Users
To ensure that your browser has been configured to run Osprey as well as possible, follow this guide to ensure that Internet Explorer is fully set up to run Osprey.
Step 1
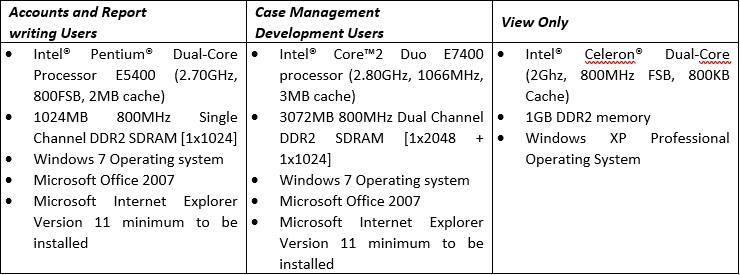
You may experience difficulties using Osprey Approach if your computer does not comply with the minimum hardware specification (see the last page of this guide).
Do NOT use InPrivate Browsing with Osprey Approach.
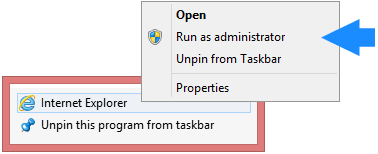
It may also assist to run Internet Explorer as an administrator by right clicking the icon, then right clicking ‘Internet Explorer’ and then choosing ‘Run as Administrator’.
For workstations where case management and document production facilities are to be used, please ensure that the Osprey Silverlight Document Control is already installed. (For further information, see “How to Install the Silverlight Document Control for Osprey Approach”)
Step 2
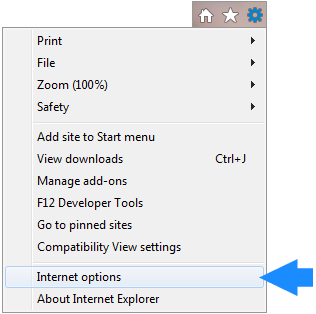
First, open Internet Explorer.
In the top right-hand corner, click the Tools icon , then select Internet Options as shown here.
Your Internet Options panel will now appear.
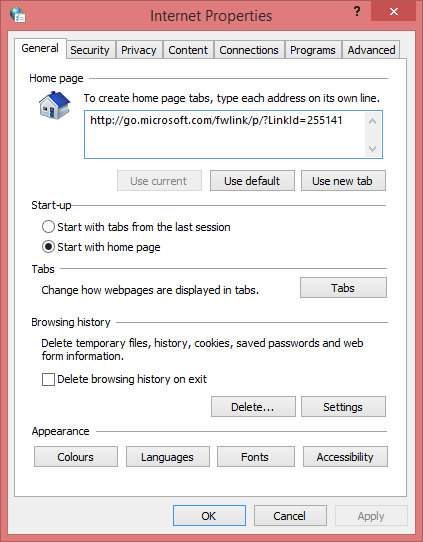
Step 3
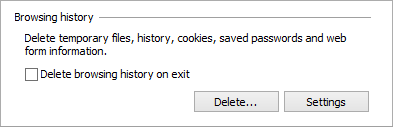
On the General tab, in the Browsing History section, click the Settings button.
Ensure that ‘Check For Newer Versions of Stored Pages’ is set to ‘Automatically’ and that the ‘Disk Space’ to use is within the recommended limits as displayed in this screenshot.
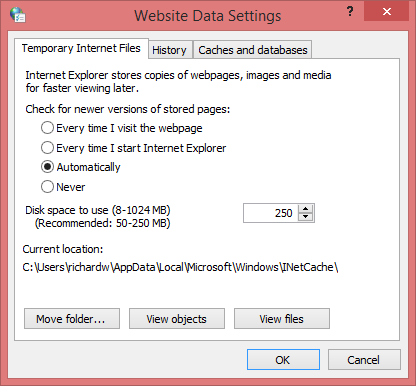
Click ‘OK’ to save any changes.
Step 4
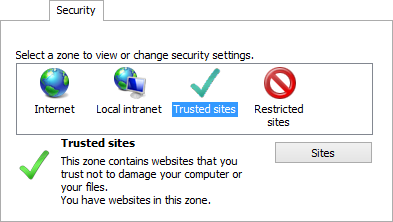
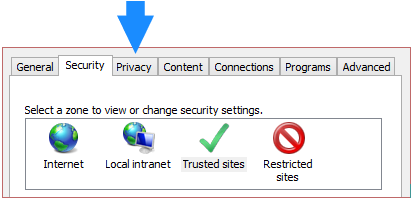
On the ‘Security’ tab, highlight ‘Trusted Sites’, and then click the ‘Sites’ button.
There will be a ‘Require Server Verification’ tick box towards the bottom of this panel. Ensure that this box is unticked.
Now place https://*.ospreyapproach.com in the ‘Add Website’ box and then click ‘Add’ to add Osprey to your list of trusted sites. The Trusted Sites panel should now display as follows:
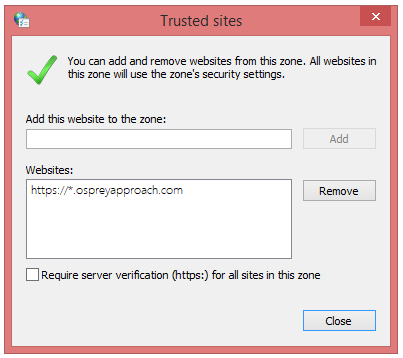
PLEASE NOTE: Your backup site will also need to be added here. Place https://*.ospreyapproachbackup.com in the ‘Add Website’ box and then click ‘Add’ to add your Osprey backup to your list of trusted sites.
Step 5
Select the ‘Close’ button to return to the Internet Options panel. Toward the bottom of the Security tab, there is a ‘Security Level’ area.
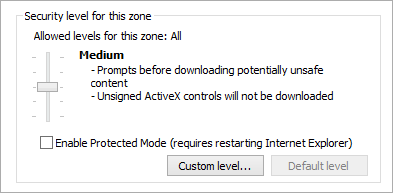
Untick the option for ‘Enable Protected Mode’. Please note that this may not be present on all browsers.
Step 6
Once done, select the ‘Custom Level’ button to open a new panel. Now scroll down until you come to the section called ActiveX Controls and Plug-ins.
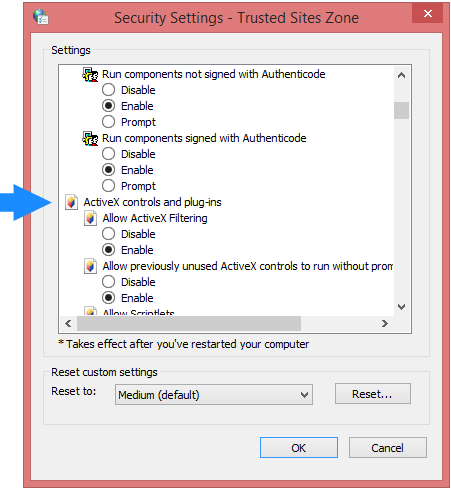
Ensure that these are set as follows:
Allow ActiveX filtering – Disable
Allow previously unused ActiveX Controls to run without prompt – Enable
Allow Scriptlets – Enable
Automatic prompting for ActiveX controls – Enable
Binary and script behaviours – Enable
Download signed ActiveX controls – Enable
Download unsigned ActiveX controls – Prompt
Only allow approved domains to use ActiveX without prompt – Disable
Run ActiveX controls and plug-ins – Enable
Run antimalware software on ActiveX controls – Disable
Script ActiveX controls marked safe for scripting – Enable
Once the above settings have been confirmed, scroll down to the ‘Miscellaneous’ section.
Locate the option to ‘Include local directory path when uploading files to a server’, highlighted here, and ensure that the radio button is set to Disable.
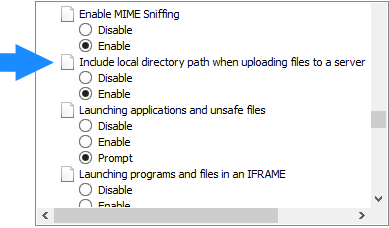
This will prevent the full path name from being shown in the details when dragging and dropping multiple files to the Osprey Matter History in Internet Explorer.
Now scroll down the list until you come to a section headed ‘Scripting’.

Ensure that the following two settings are correct.
Active Scripting – Enable
Scripting of Java applets – Enable
Step 7
Now click ‘OK’ to close this window and return to Internet Options. Once back on the Internet Options panel, select the ‘Privacy’ tab.
Ensure that the slider at the top of this panel is set to ‘Medium’ as highlighted below. Then click on the ‘Sites’ button underneath.
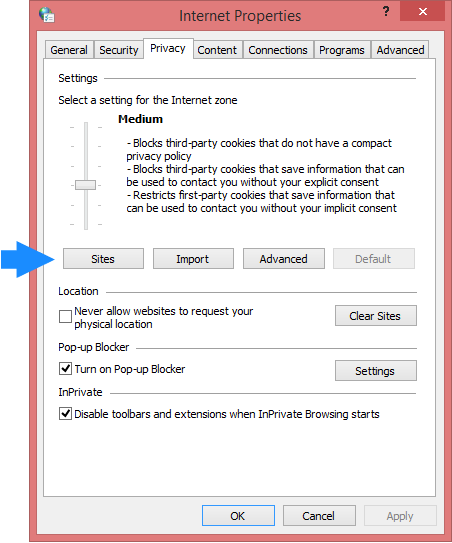
This will bring up the ‘Per Site Privacy Actions’ panel in which we can specify sites on which to allow cookies to be saved.
As with Trusted Sites, enter *.ospreyapproach.com in the ‘Address of Website’ box and then click the ‘Allow’ button to add it to the ‘Managed Websites’ area as shown in the following screenshot.
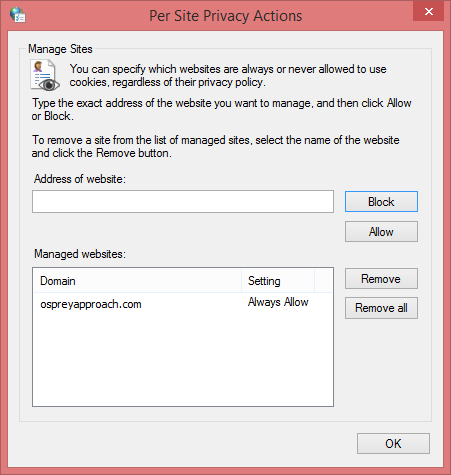
Click ‘OK’ to close this window.
Step 8
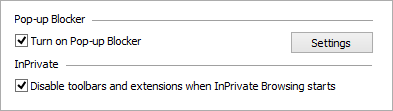
The panel will now return to the ‘Privacy’ tab. Towards the bottom of the tab there will be a section for the pop-up blocked. Ensure that ‘Turn on Pop-Up Blocker’ is ticked and then click the ‘Settings’ button to open up another panel.
As previously, enter *.ospreyapproach.com into the ‘Address of Website to Allow’ box and then click ‘Add’ so that the panel appears as follows:
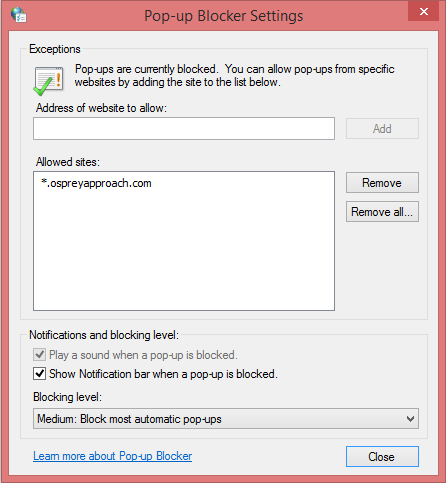
Click ‘Close’ to return to Internet Options. You may now click the ‘Apply’ button in the bottom right. Should this button be greyed out, select ‘OK’ to close the panel.
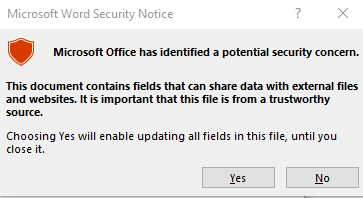
A recent security update for Microsoft Office will result in a Security Notice when running documents from Osprey. This may be resolved by adding Trusted Locations within Microsoft Word
Step 9
Step 10
Step 11
Step 12
Step 13
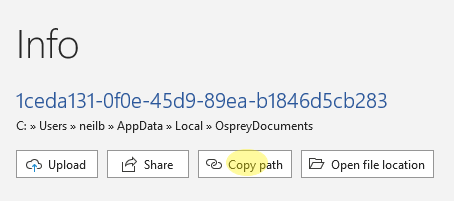
Click Add new location
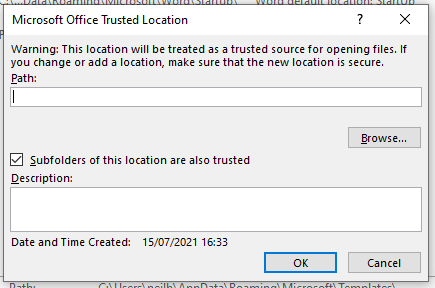
In Path: press Ctrl + V, remove the end of the path so it resembles either
C:\Users\{Windows User}\AppData\Local\Packages\PraccticeLimited.OspreyApproachCaseManagementApp_expxx2x1s6rv4\LocalState\
or
C:\Users\{Windows User}\AppData\Local\OspreyDocuments as above.
Tick Subfolders of this location are also trusted
Click OK
Step 14
If problems still persist with Osprey Approach after following the above instructions then it may be worth doing the following at the Osprey Login page.
Hold down the ALT key on your keyboard, and then press the T key.
On the Tools menu, select Smartscreen Filter. Then click on ‘Turn Off’.

IMPORTANT: Please ensure that any pop-up blockers installed in third party toolbars (for example, Google Toolbar, etc.) are turned off.
Step 15
Minimum Hardware Specification
Workstations:
Internet Connection
Broadband ADSL Internet connection. Bandwidth is based on number of users.
Internal Network Connections
When Osprey Approach is to be used via an internal network, a router / firewall will be required in order to connect all users at to the same Internet connection. A print server may also be required to allow for central printing and the central storage of data that does not relate to the Osprey Approach system.
If any of the above is already installed within a firm, Pracctice reserve the right to audit its suitability for Osprey Approach. If any of these items are to be installed as part of the Osprey Approach project Pracctice must be consulted by the suppliers of these services in order to verify their suitability.
Anti Virus Protection
All Clients are responsible for their own virus protection scheme. Many sites opt to put Firewalls in place but these do not replace the need for anti-virus Software. Firms must also ensure that they are running the appropriate level of protection for the solution at their offices.
Please note all of the above only relates to the successful implementation and running of the Osprey.TM system. For advice and the minimum requirements needed for any other applications / services the practice wishes to install and run they should refer directly back to the supplier of these services
Safe Mode
Should you still be experiencing issues either printing or running documents, restart your computer in Safe Mode with Networking to make use of the Administrator account and run through this guide and log into Osprey Approach to install the necessary files.
For information on starting your computer in safe mode make use of the following link to one of Microsoft’s Knowledge Base articles: https://support.microsoft.com/en-gb/help/12376/windows-10-start-your-pc-in-safe-mode
Remember! Only Internet Explorer 11 is supported by Microsoft! You may experience some issues if using unsupported browsers!