Configure Your Browser: Mozilla Firefox
Updated Jul 27th, 2020
Who is this guide for?
Any Users
To ensure that your browser has been configured to run Osprey as well as possible, follow this guide to ensure that Firefox is fully set up to run Osprey.
Step 1
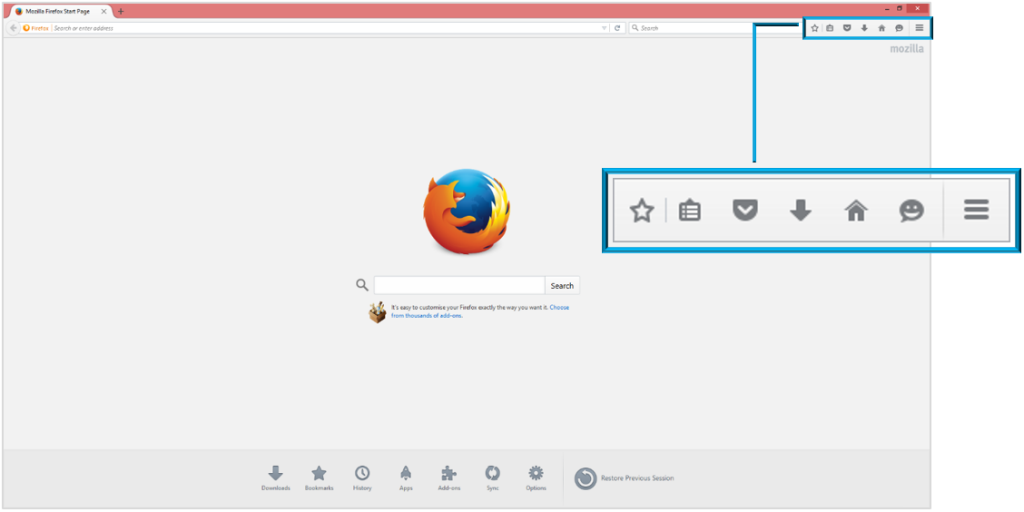
At the top right of your Firefox screen, you have a series of icons, as displayed here:
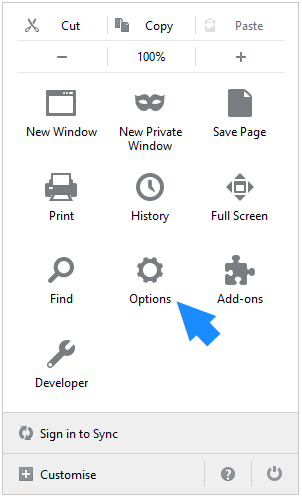
Select the ‘Open Menu’ option, highlighted below, to open up a further list of options which will allow you to configure the browser.

There will be an ‘Options’ icon available in this list, as highlighted here. Select this to open a new Firefox window displaying your available options.
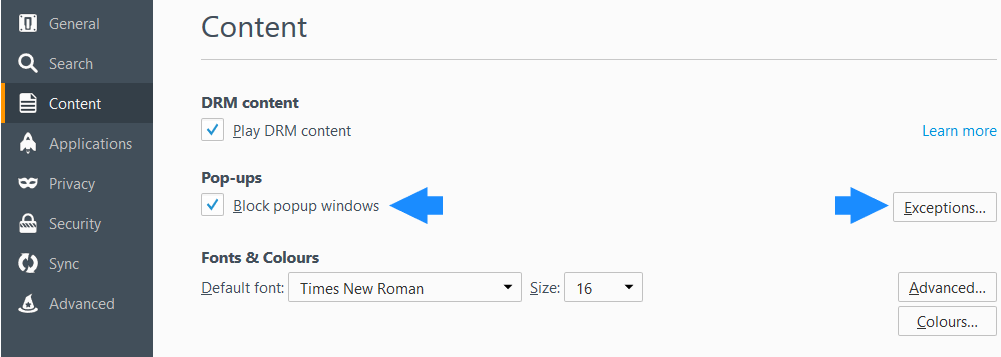
To ensure that Osprey is fully compatible, we will only need to edit the Content and Security options available in the side bar.

First, select the ‘Content’ tab to display the screen below. Ensure that ‘Block Popup Windows’ is ticked, then click the Exceptions button.
A new panel will appear which will allow you to enter the details of sites you wish to be exempt from the pop-up blocker.
In the ‘Address of Web Site’ box, enter ospreyapproach.com and then click on the ‘Allow’ button.
The panel should now appear as follows with osprey approach present in the list of allowed sites.
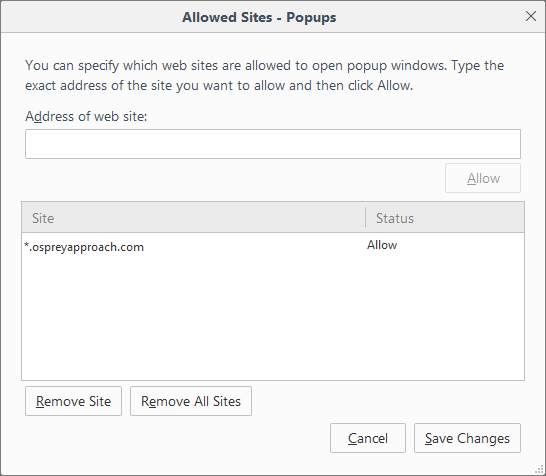
Once complete, select ‘Save Changes’ to return to the options menu.
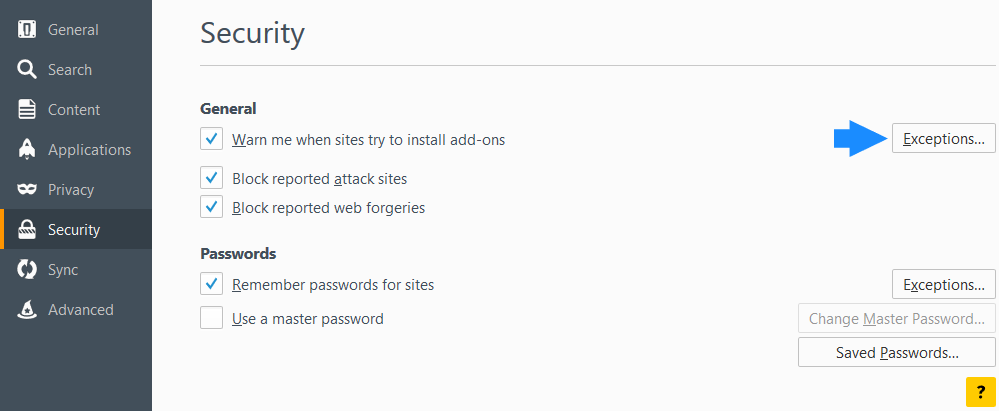
Now select the ‘Security’ tab in the side menu to open up the screen displayed below. Select the ‘Exceptions’ button opposite the General list.
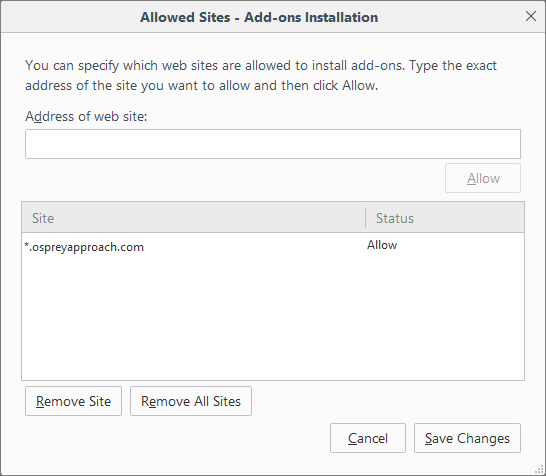
A new ‘Add-Ons’ panel will appear which will allow you to enter the details of sites you wish to allow add-ons to run on.
In the ‘Address of Web Site’ box, enter ospreyapproach.com and then click on the ‘Allow’ button.
Once done, select ‘Save Changes’ to return to the options menu.
The Options tab can now be closed by selecting the cross available on the tab bar.
