Convert2Client
Updated Jan 10th, 2022
Who is this guide for?
Case Management Supervisors and System Supervisors
Convert2Client helps clients drive new & incremental revenue as your customers can go online 24/7 to get a quote without speaking with anyone.
This reduces the amount of administration needed and saves your firm time and money.
We have produced a short video should you prefer to watch this.
Obtaining a Quote
There are components to Convert2Client that can be implemented directly into your website.
These include the Convert2Client Chatbot and the Quote Calculator.
Step 1
The chatbot component steps through the process by asking questions that can responded to by typing or by voice commands should a microphone be enabled.
A series of questions will follow which will enable the chatbot to compile a breakdown of the legal costs.
Once you have answered all of the questions, this pop-up will show the breakdown of legal fees. A copy will also be emailed to you.
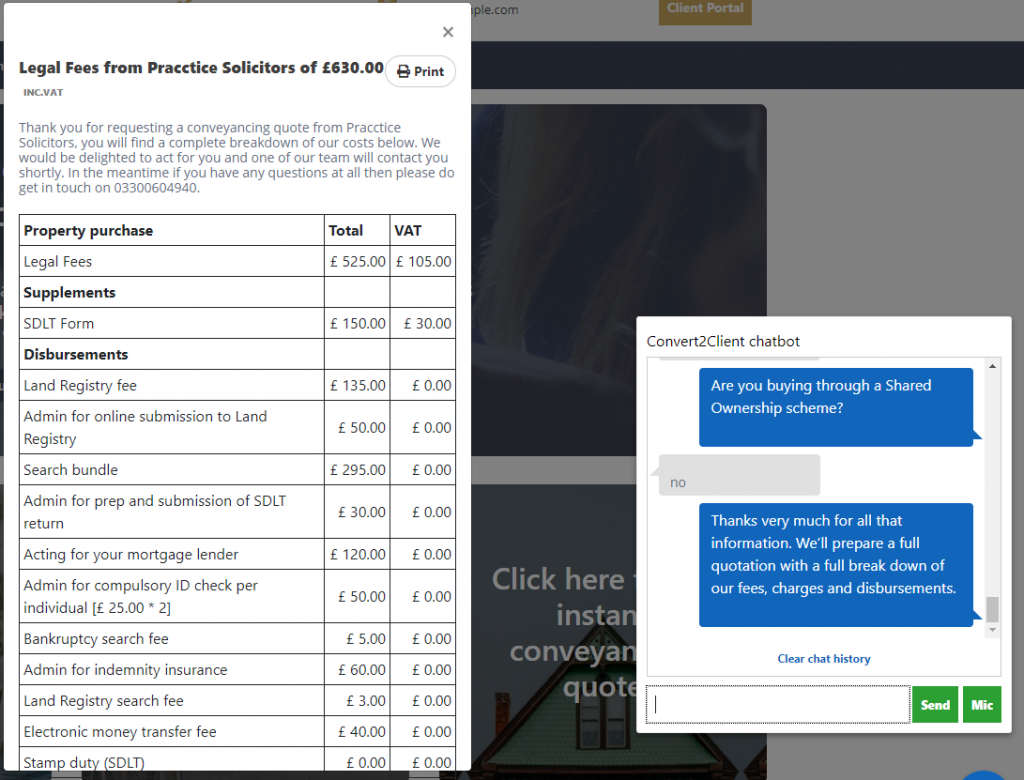
The bottom of the pop-up will display the answers to the questions posed by the chatbot.
Also on the pop-up box, the quote can be instructed by clicking Instruct this quote.
An email is sent confirming the instruction has been received.
Step 2
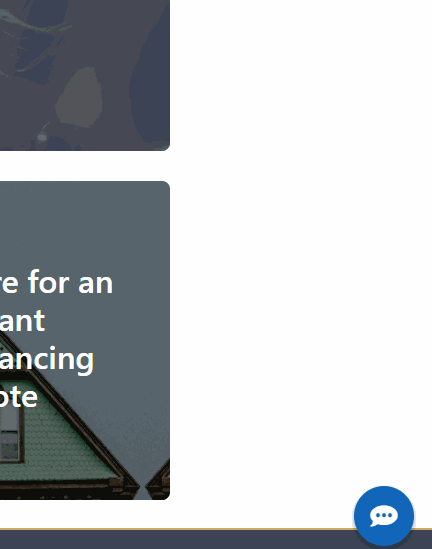
Another component is the option to get a conveyancing quote by clicking Click here for an instant conveyancing quote to bring up the Conveyancing Quote Calculator.
Here the relevant option can be selected from the top, enter a postcode along with the other information on the form including contact details. Finally clicking Get Instant Quote.
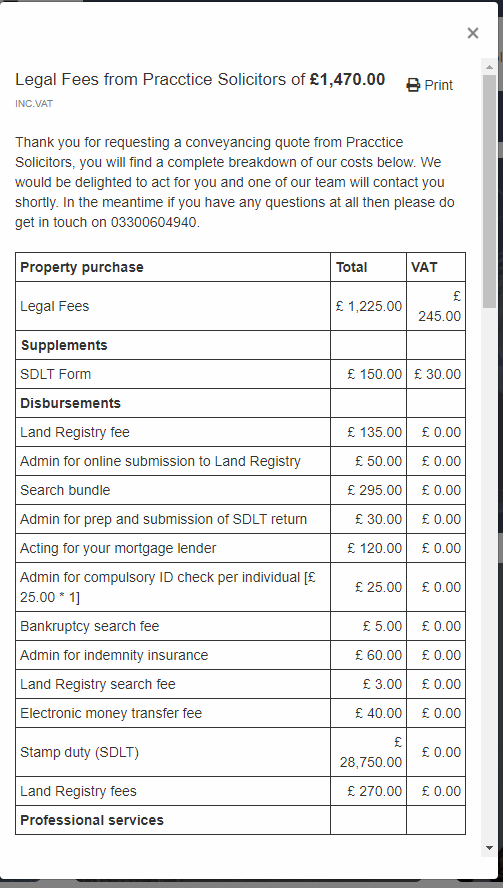
The Legal Fees are shown at the top and all additional fees will be itemised and displayed below to comply with SRA regulations. Underneath the table is the total purchase cost.
Relevant notes are shown below the the fees, as shown with the chatbot, the details entered earlier appear at the very bottom.
An email containing this information will be sent to the email address provided. Convert2Client will also send an email advising that a new online enquiry has been made.
This quote can be instructed straight away by selecting Instruct this quote.
Using the Convert 2 Client portal
Step 1
You can access your own Convert2Client portal, with the supplied credentials.
Step 2
The first page will display your dashboard. You have a pie chart displaying Enquiries vs Instructions.
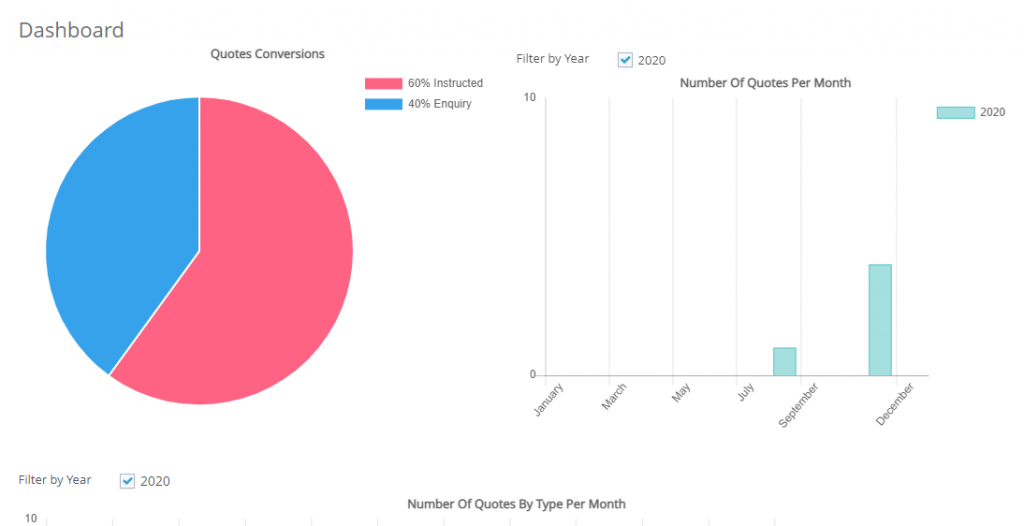
You will also see a graph showing number of quotes per month. You may select other years to view should you wish by ticking the relevant boxes. Further graphs are available underneath.
These will assist you with keeping track of the types of quotes being received, number of instructed quotes and instructed quotes by type.
Step 3
Clicking Quotes you will see a list of all quotations with their respective statuses will be displayed. Select New will allow you to create a new enquiry or new quote.
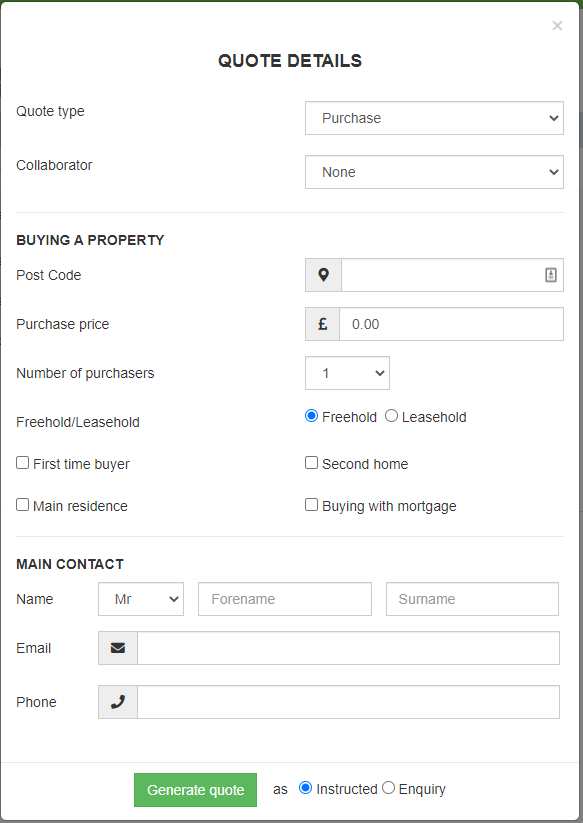
When generating a quote, you will be able to select a collaborator.
If the selected Collaborator fees are set, these fees will be applied in quote calculations. Otherwise, the Company fees are applied.
Step 4
You may filter the results, there are options to filter by the type of quote, status of the quote and whether you have used the DocuSign integration when sending the quote.

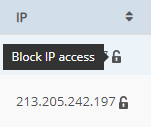
Step 5
There is also an option to block specific IP addresses should it be desired.
Step 6
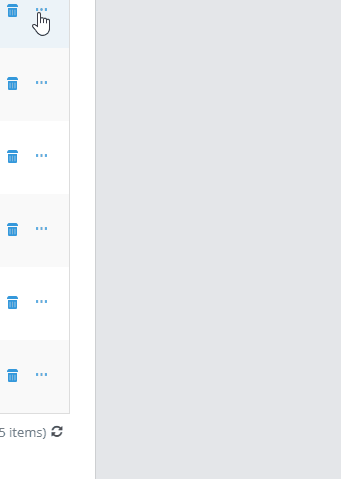
Quotes can also be deleted. Other options can also be performed, view details entered previously, as well as view the client care letter history and resend the quote by email. You can also export the quote and the client care letter to Osprey.
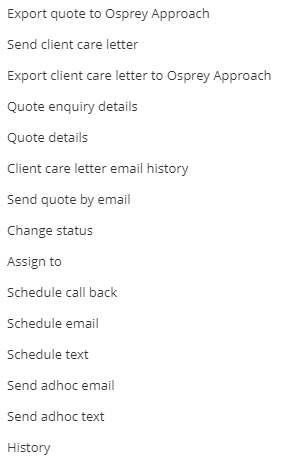
Step 7
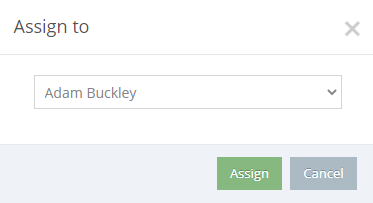
Quotes may be assigned to users who will progress them
Step 8
Running the client care letter displays the letter to be edited, when ready click Next will open the default email template which of course may be configured.
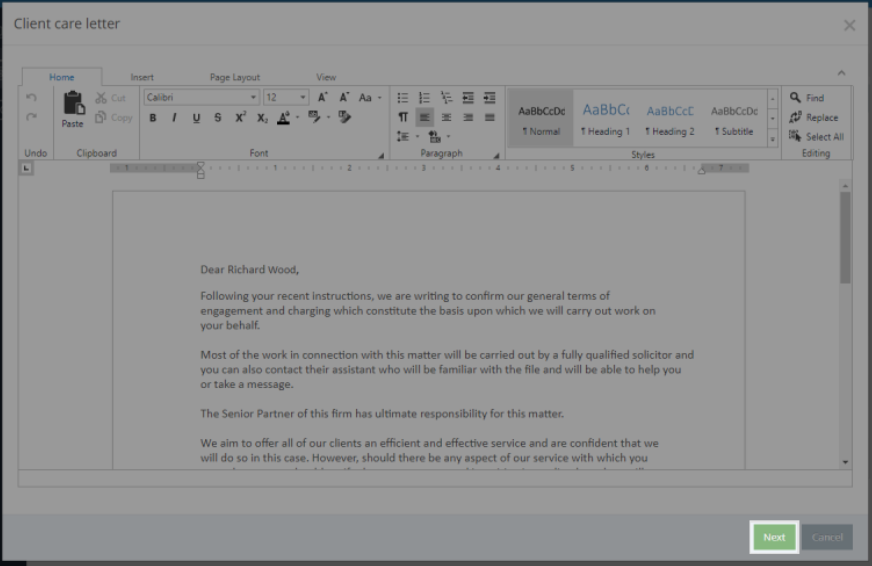
We also integrate with DocuSign to allow documents to be electronically signed. Please note that you will need a DocuSign account to use this and of course sign into it when clicking Send Email.
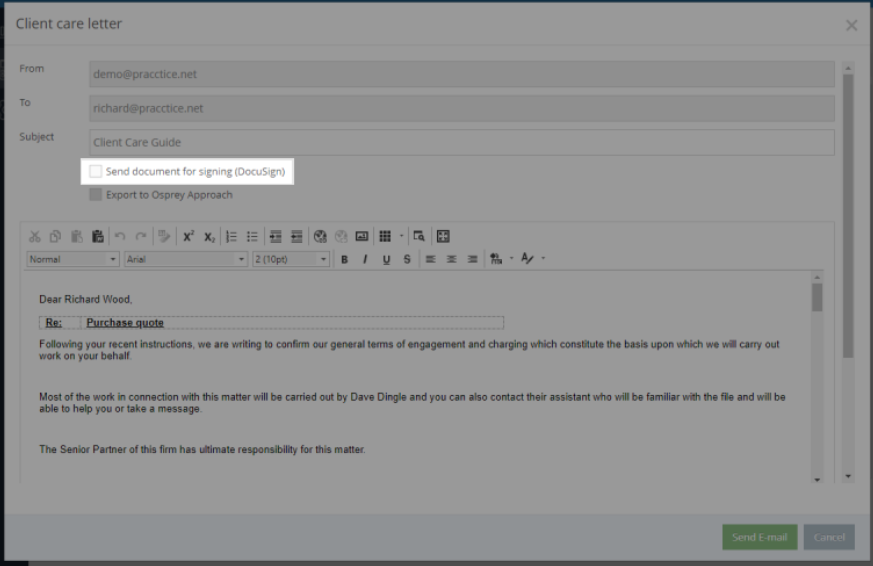
At the bottom of the received email there will be a link to click to add a signature and send it back automatically.
Step 9
It’s possible to add reminders to call the potential client
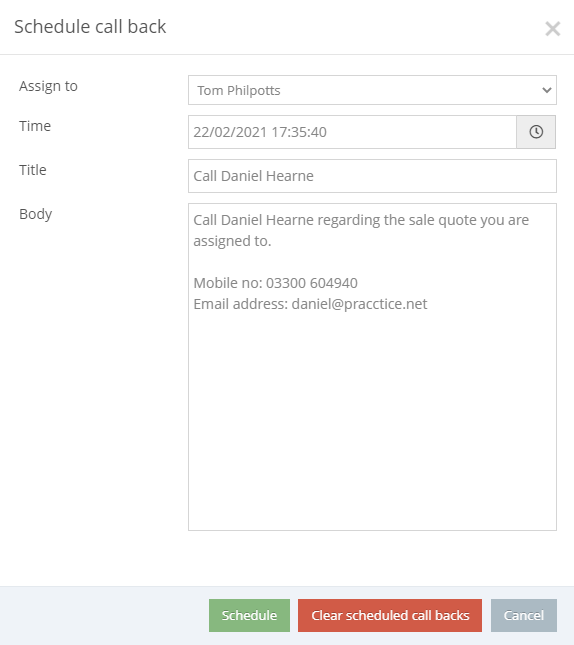
Step 10
It is possible to send email regarding the quote

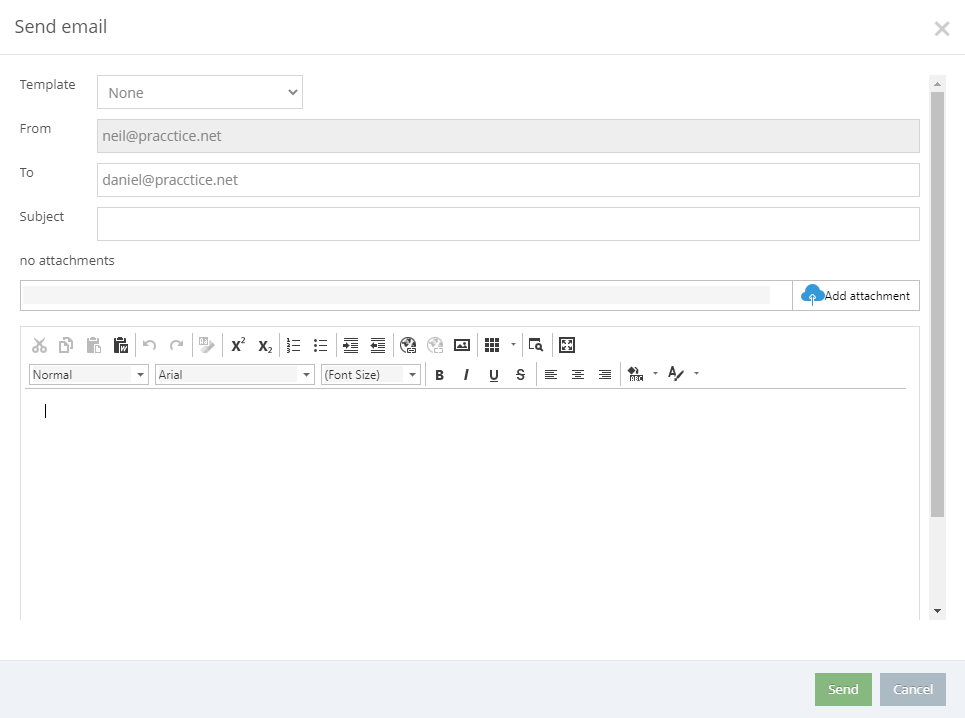
Choosing Schedule Email shows the same form along with the option to set a date and time.
Step 11
Text messages may be sent to the potential client
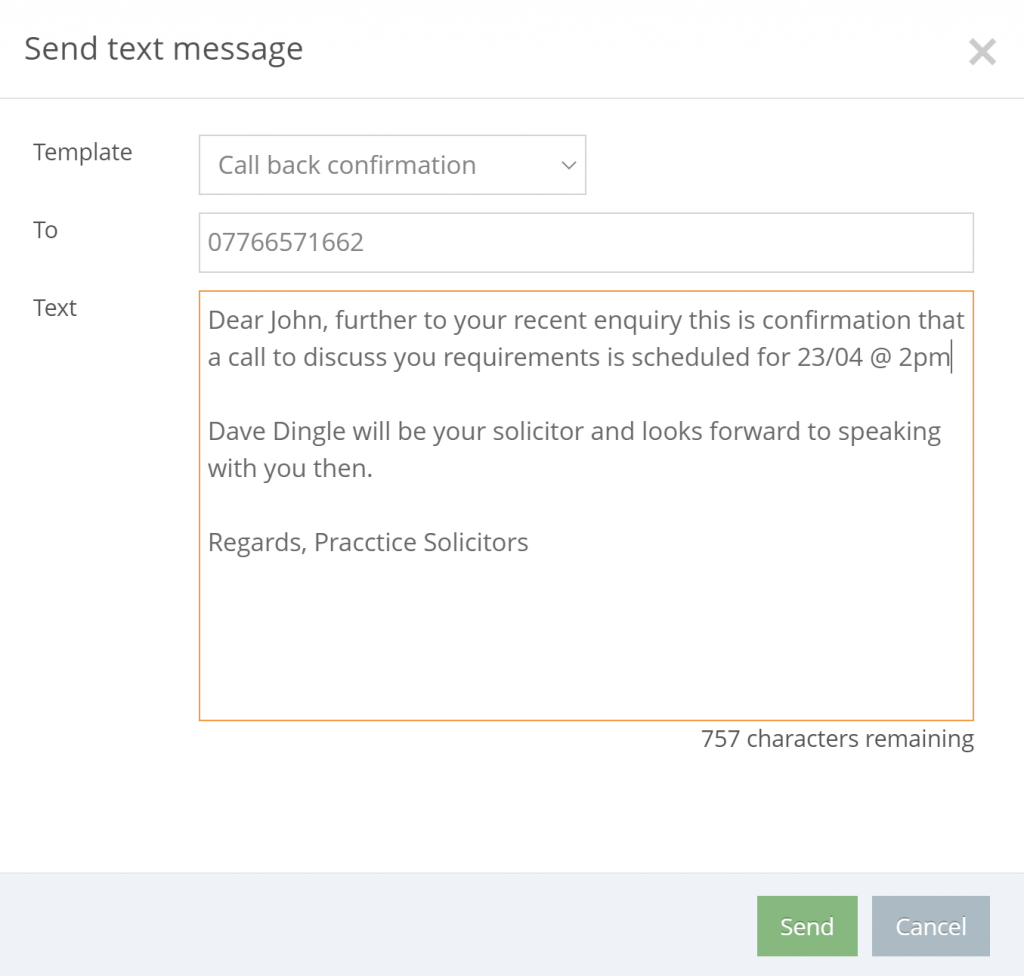
Choosing Schedule text shows the same form along with the option to set a date and time.
Step 12
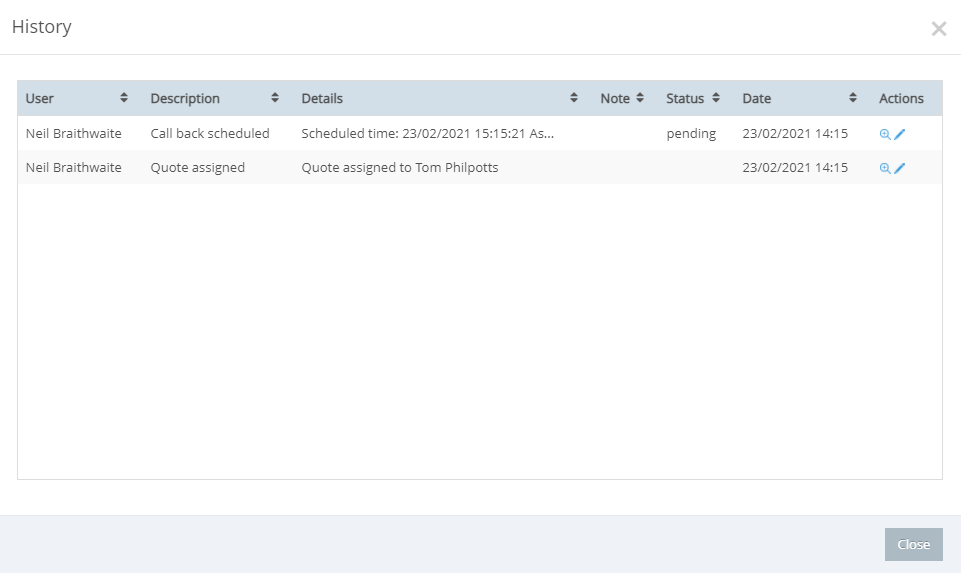
You may view the action history of a quote
Convert 2 Client in Osprey
Step 1
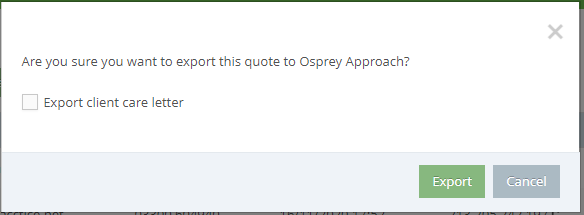
Export Quote to Osprey, tick Export client care letter and click Export.
The data entered in Convert2Client will be created as a prospect matter, all the information entered online will be placed into the Approach2Quote dossier page within Case Management > Dossier. The client care letter exported will appear in the Matter History.
Portal Setup Options
Step 1
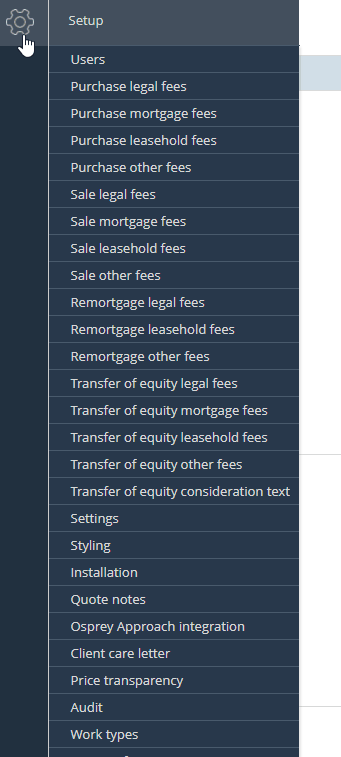
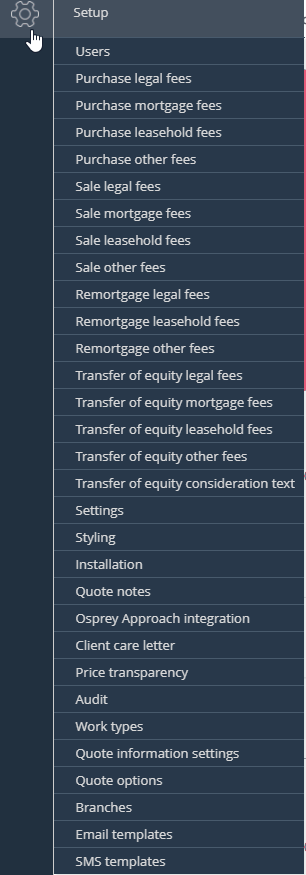
Click Setup in Convert2Client portal, you will see a number of options
Step 2
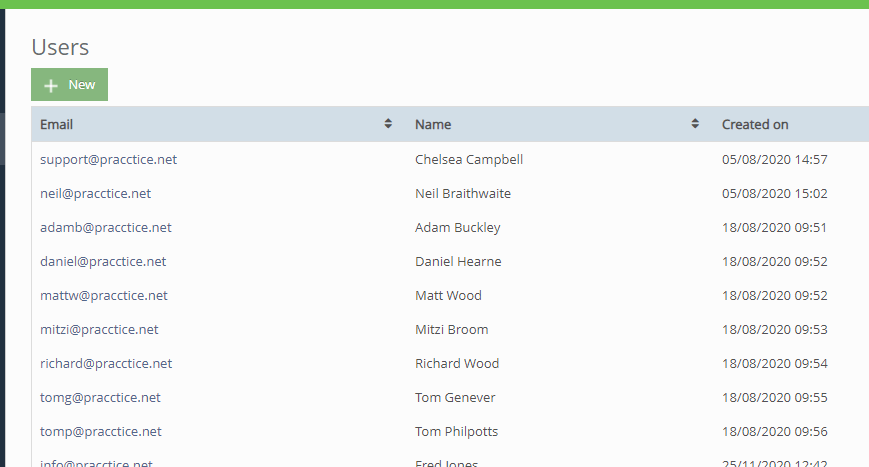
Selecting Users you may set up an unlimited number of users, select New. Simply enter the basic details and choose a role. A Solicitor will be one of your internal users. A Collaborator will be a third party, e.g. an Estate Agent, who would then be able to create quotations while the customer is with them. An Administrator user will have access to the supervisor area and will be able to change any of the settings available.
Step 3
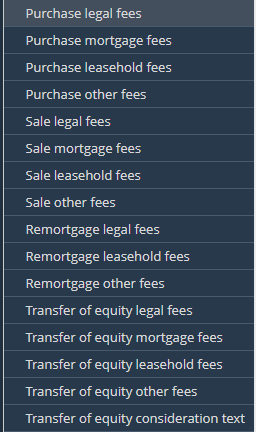
Supervisor level users can amend these areas to set up legal fees. Simply add an End Value and a Fee, then click Save.
Step 4
Clicking Settings will allow you to amend fixed fees if needed.

You can amend then save if required.
Step 5
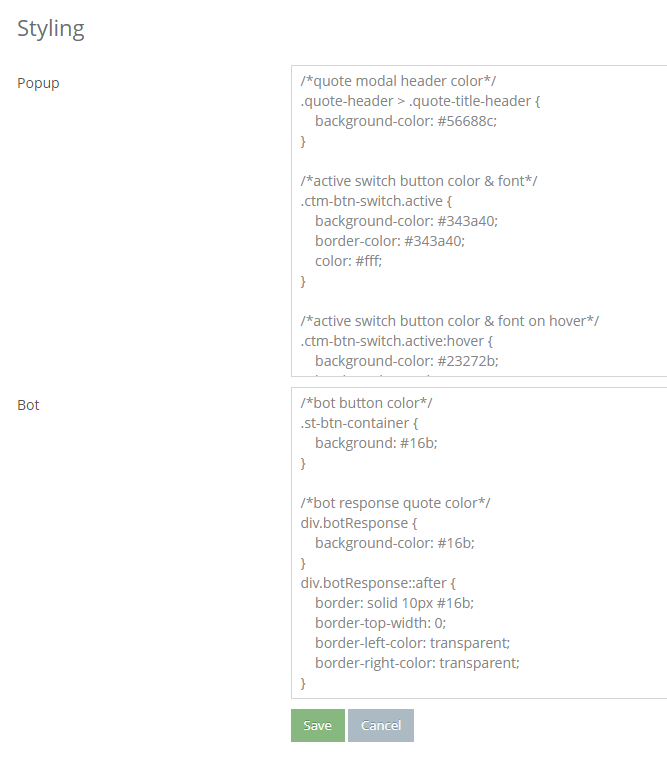
Styling will affect the button styling on your website,
Step 6
The Installation area shows the code to be copied to your website to use the Convert2Client services. The code in the Common box is required by both the chatbot and the form. The code in the Popup box relates to the form only. The code in the Bot box relates to the chatbot only.
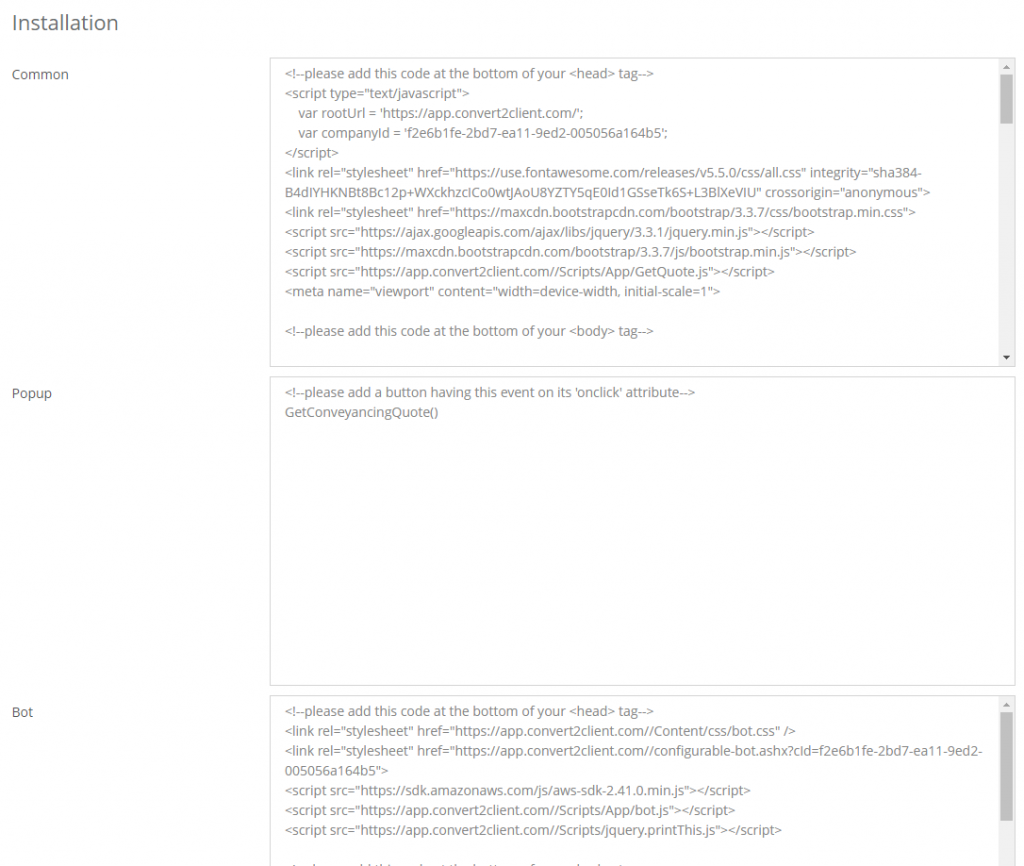
Your domain hosts will be able to assist with amending this.
Step 7
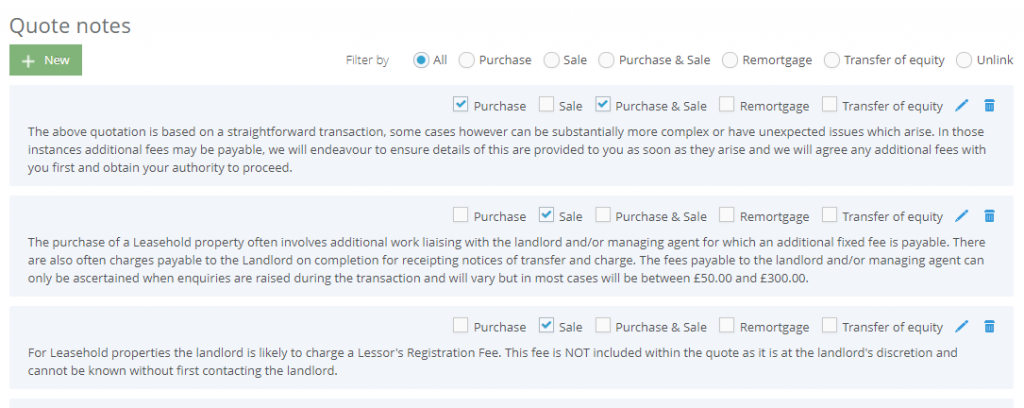
The Quote Notes are the notes which appear on the pop-up quote. You may add new notes, and customise the existing notes as required and define which type of quote they will appear on.
Step 8
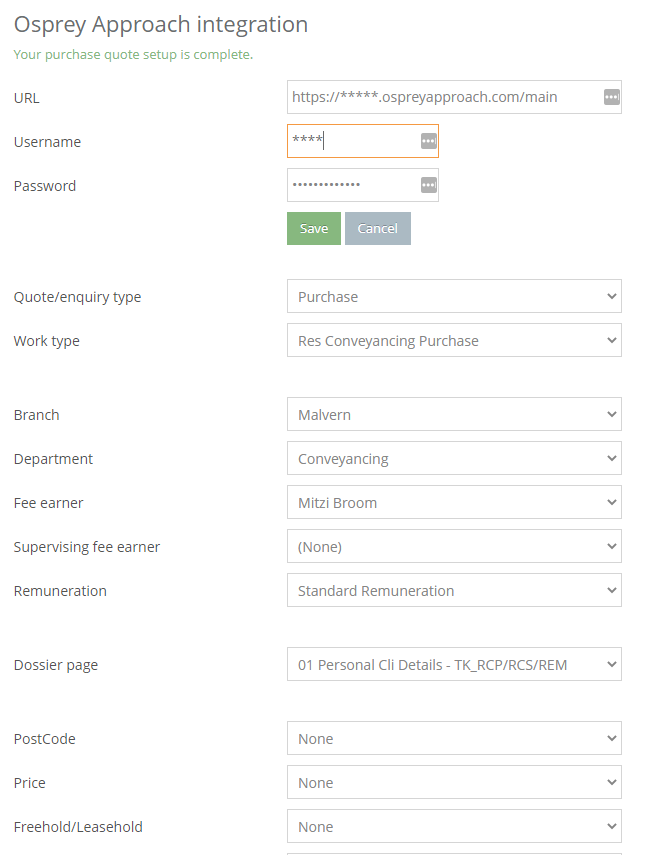
You can set up Osprey integration by clicking here. Fill in the relevant fields, e.g. work type and dossier page, and then click Save to set up the integration.
Step 9
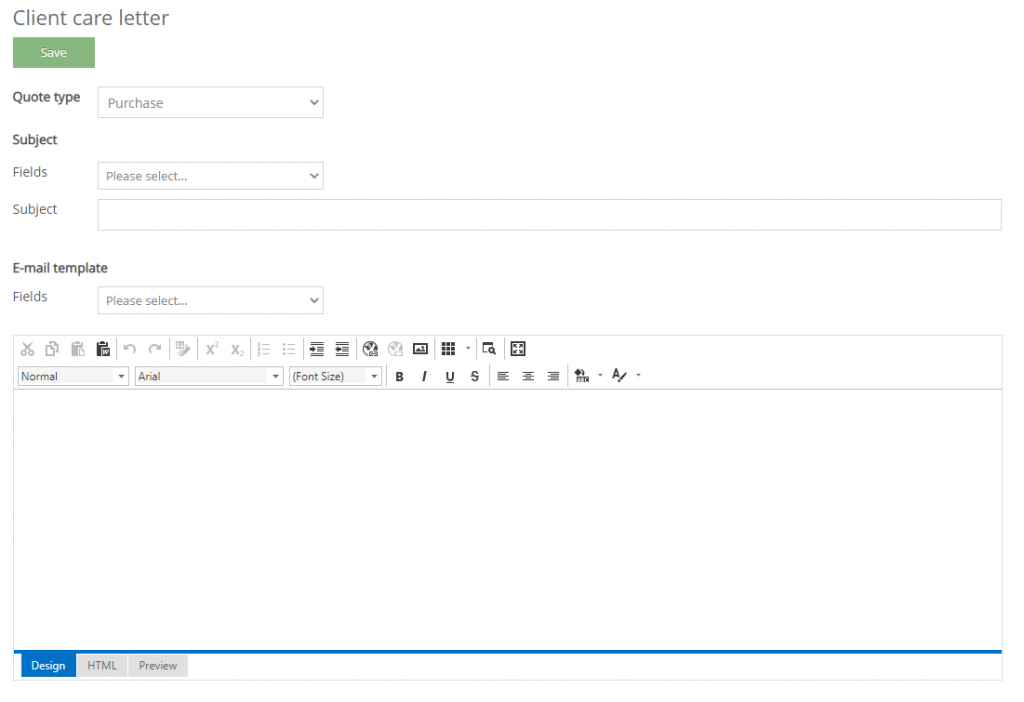
You can amend the email template as required, as well as the Client Care Letter. You can also include extra files to be sent alongside the client care letter should you wish. Simply drag and drop them.

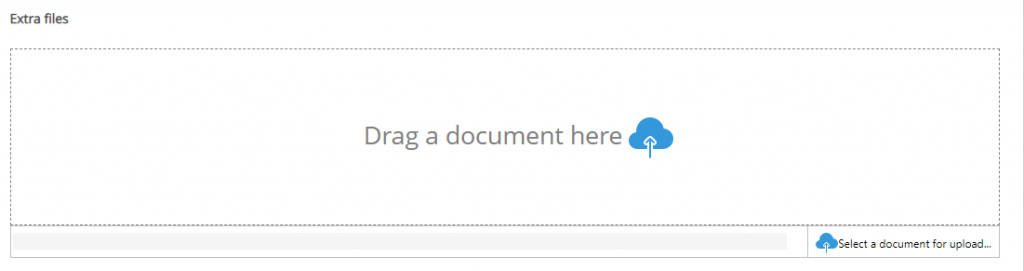
Additional documents will be listed which can be downloaded or removed.

Step 10
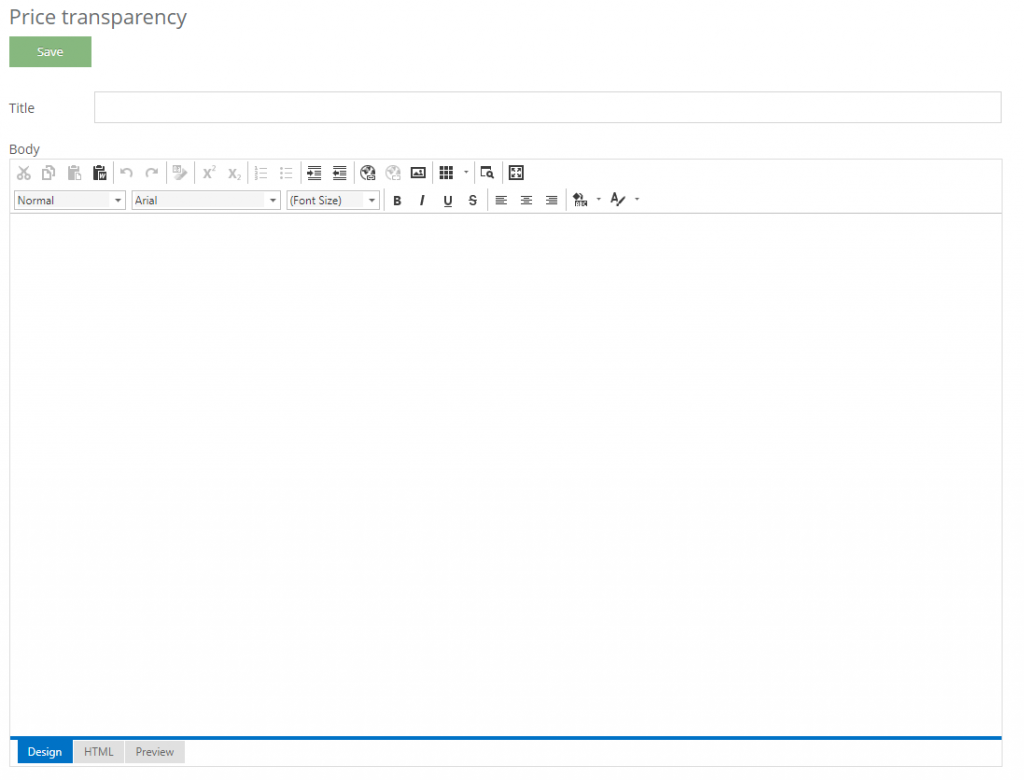
Price Transparency allows you to link to a page containing price information, which is a legal requirement from the SRA. You can amend and save this as required.
Step 11
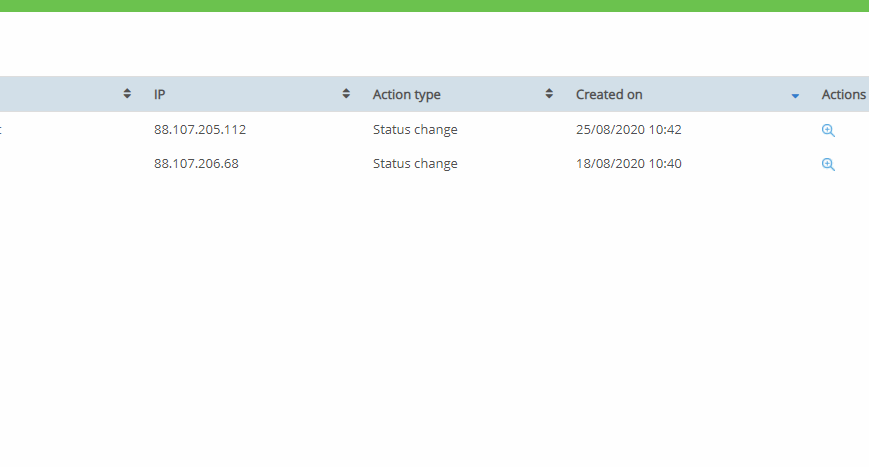
You also have access to an Audit area, select the Action buttons for more information.
Step 12
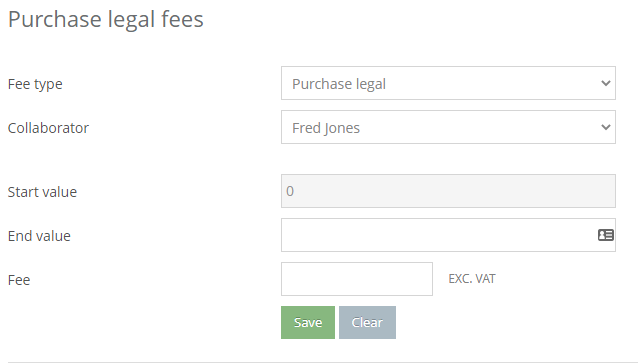
Collaborator Fees can be set so their fees are applied rather than yours when the quote or enquiry is made. Select a Fee Type and Collaborator and add a Start Value, an End Value and a Fee, then click Save.
Step 13
Predefined Email Templates can be created to make communication more efficient

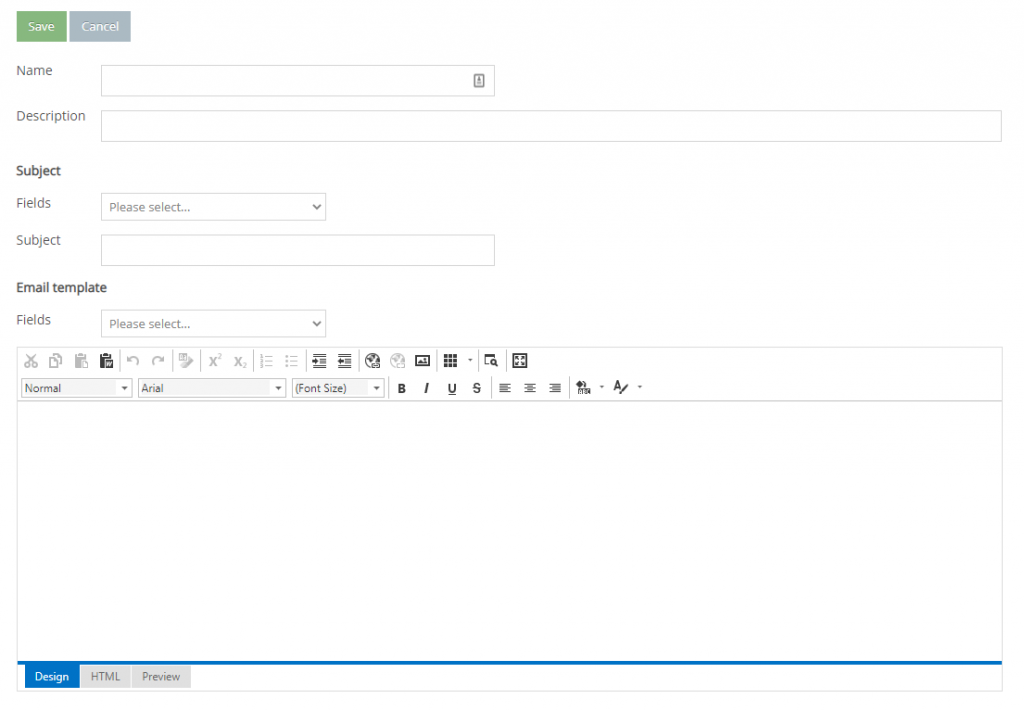
Please fill in a name and description, you may then fill in the subject and body content to use, to insert merge fields place the cursor and from the Field list select the desired field
Click Save when finished
Step 14
Predefined SMS Templates can be created to make communication more efficient
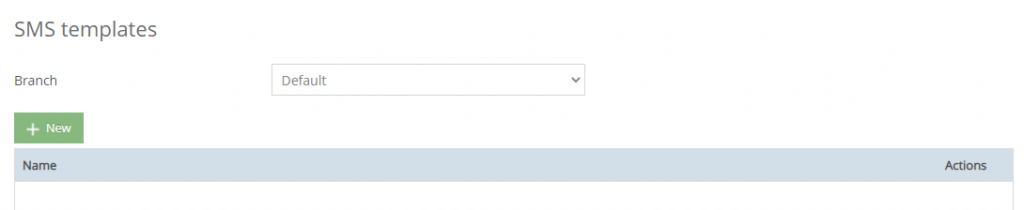
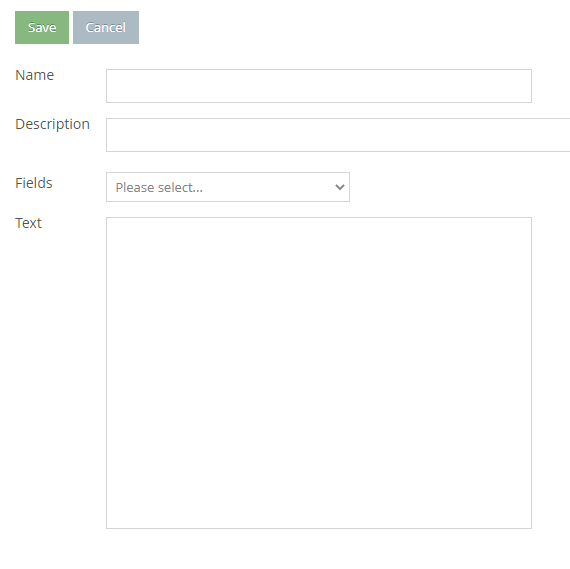
Please fill in a name and description, you may then the content to use, to insert merge fields place the cursor and from the Field list select the desired field
Click Save when finished
Step 15
Select the drop-down arrow next to your username to view your user and company profile options.
The Company Profile will allow you to amend your firms details, including contact details and Text Anywhere credentials. You can also specify where instructions and enquiries are sent.
Don’t forget to click Logout to end the session in portal