Create Custom Questionnaires
Updated Jun 14th, 2024
Who is this guide for?
Case Management Supervisors and System Supervisors
This guide will assist you in creating custom questionnaires
You can set up custom questionnaires that allow you to view and amend a pre-defined selection of dossier fields. These can also be incorporated into Workflows to help streamline your firm’s data entry.
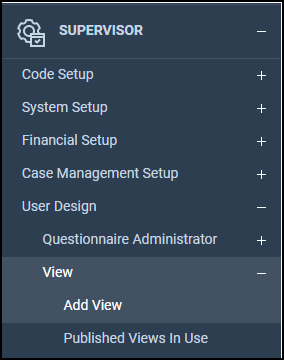
Creating a new questionnaire
Navigate to Supervisor > User Design > View > Add View.
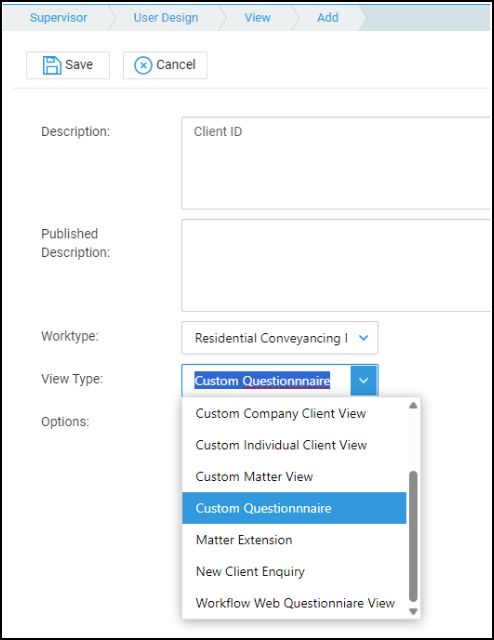
Next, you will need to add a Description, a Worktype, and then select Custom Questionnaire.
Published Description is only required for New Client Enquiries or Web Workflow Questionnaires.
Once complete, click Save. You will then be returned to the Views area.
The Views screen
To start linking fields to your questionnaire, we will have to locate the view.
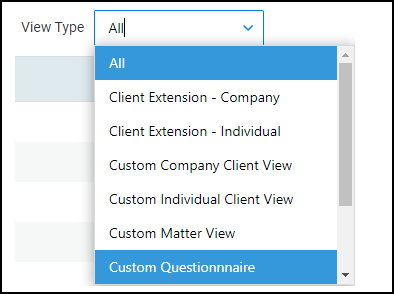
To assist, Osprey has a filter option to allow you to filter down to a specific View Type.
Select Custom Questionnaire from this list to filter all Custom Questionnaires.
When you right click your new Questionnaire, a list of actions will appear.
- Edit: will allow you to change the Description and Published Description. You will not be able to change the View Type or Work Type.
- Delete: will allow you to delete the custom questionnaire created.
- Clone: will allow you to clone the questionnaire.
You can clone views/questionnaires across work types, however if any dossier fields are not available on the destination work type, these will not be cloned - Link: will allow you to link dossier fields to your questionnaire.
Linking fields to your Questionnaire
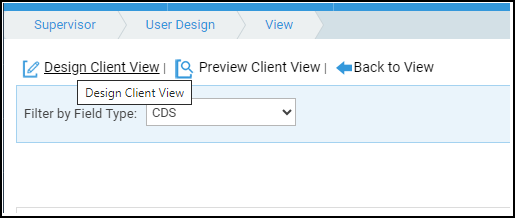
Right-click on your View and select Link.

You will be shown the option to Filter by Field Type at the top of the screen.
- DCS: shows all fields available as standard under the criminal and civil billing.
- Client: shows all fields available for Client or Matter information.
- Dossier: allows users to filter down all dossier pages linked to the work type assigned to the view, and then the corresponding dossier fields.
- Notes: option shows you any Standard Text Notes which have been set up from within Supervisor > Code Setup > Standard Text Descriptions.
These are text only notes, allowing further descriptions or dividers between groupings of fields.
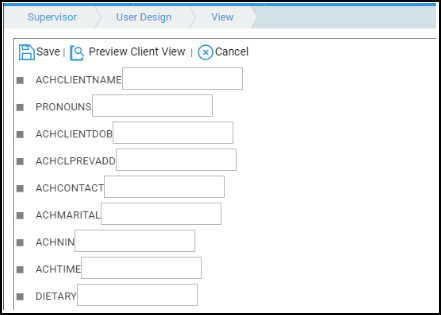
In order to link any fields to your View/Questionnaire, place a tick under the Link/Unlink column of the relevant field, and click Save Link Status.
To remove, untick the relevant field, and click Save Link Status.
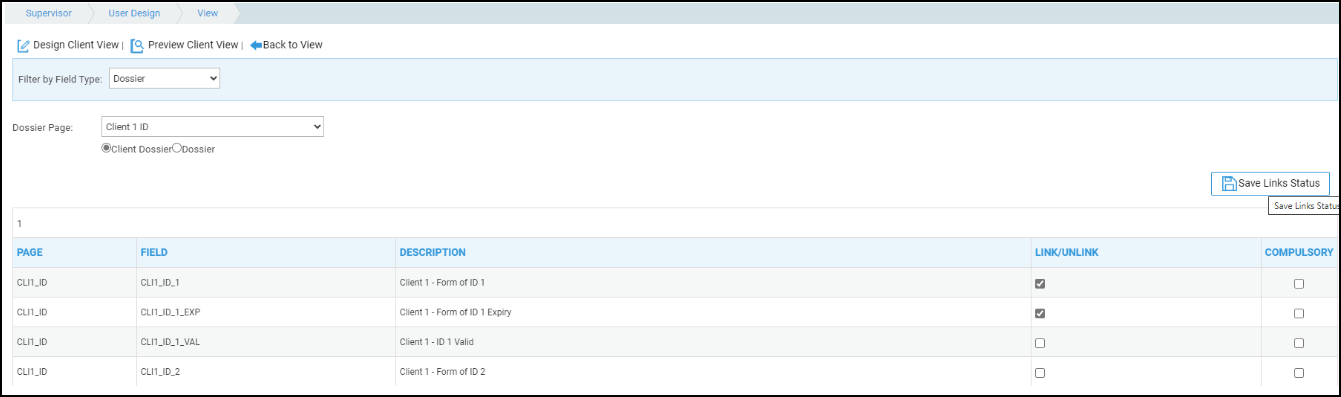
You may also make any fields compulsory if you wish.
Compulsory fields are fields that cannot be left blank. Due to this, the compulsory option will not function when using list fields, or fields which have a default option (such as a default date).
Select Save Links Status once finished.
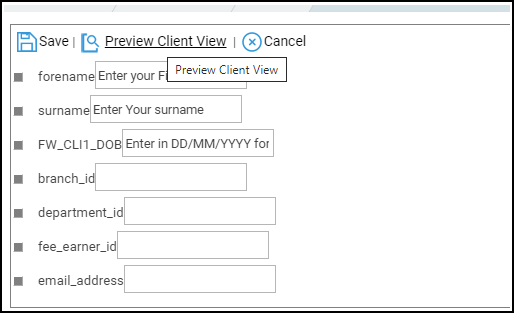
Design your Questionnaire
Click Design Client View and a list of fields will be displayed.
To reorder, click and drag the grey handle icon, allowing you to reposition the field to a preferred location within the questionnaire. You can also add help text to fields by typing the help text into the relevant text field.
Click Save to keep your changes.
Preview your Questionnaire
You can preview any views with the Preview Client View option.
This will allow you to preview the questionnaire’s order and help text.
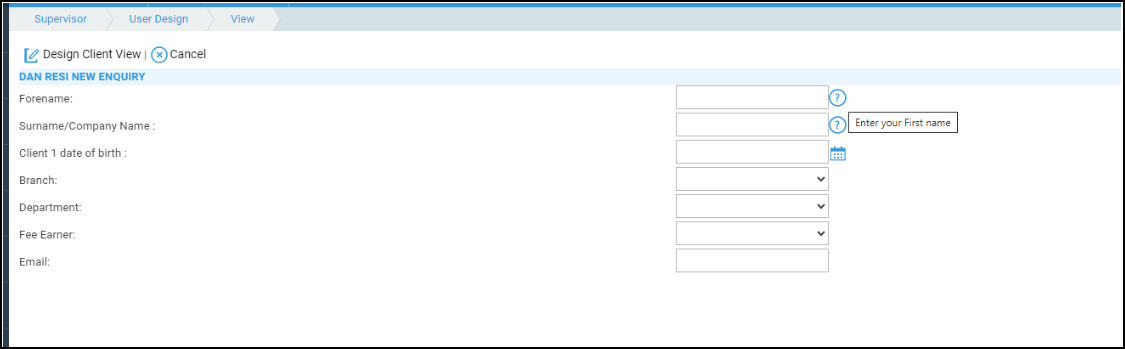
Run your Questionnaire
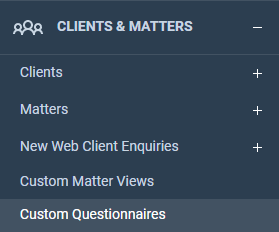
Your new custom questionnaire will now be available under Clients & Matters > Custom Questionnaires.
Select this tab to open up your list of custom questionnaires available for the currently selected client.
Ticking Global Custom Questionnaires box should you wish to access any questionnaires set as Global.

Run will then show your questionnaire for the selected client, allowing you to capture information for your matter.
Please refer to the Create and Edit Workflow Tasks guide to see how to incorporate custom Questionnaires into your Workflows.