GDPR: Performing Data Erasure
Updated May 29th, 2020
Who is this guide for?
Case Management Supervisors and System Supervisors
In line with GDPR regulations, Osprey Approach offers authorised personnel the ability to remove all data held on an archived client’s file.
We have also produced a short video if you prefer to watch these steps.
Step 1
To utilise this functionality, relevant access must be granted to suitable personnel. There will be a two-step level of authorisation required, therefore, you will need to nominate users whom are requesters and users whom will authorise the requests. Authorisation is set up within the supervisor menu as shown below.
Please note that a user cannot be both an authoriser and a requester!
Authorisation is set up within the supervisor menu as shown below.
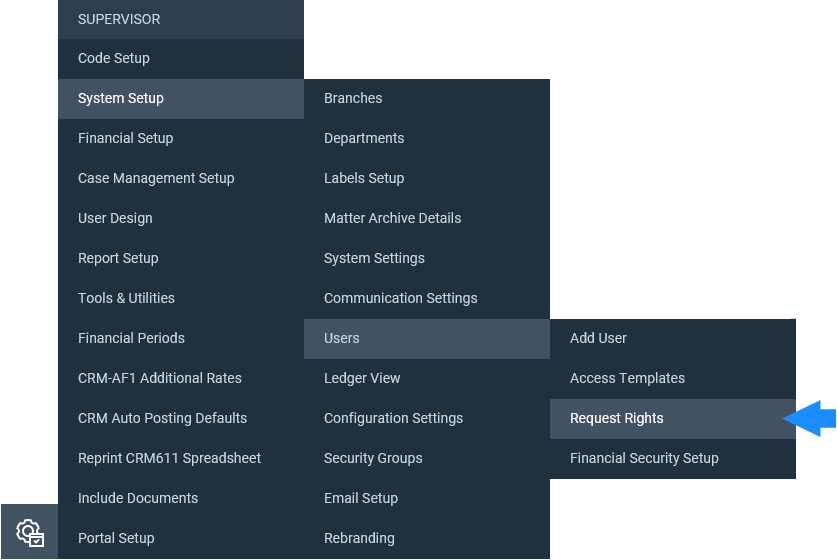
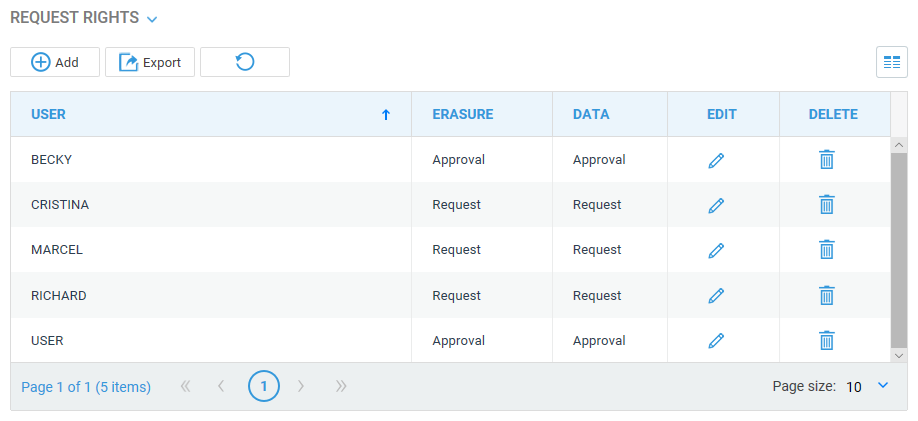
If any users have been assigned rights, they will appear in the list.
Step 2
Select the ‘Add’ button. The screen below will appear and will allow you to select a user from the drop-down list, then allocate Erasure or Data Request permissions to them.
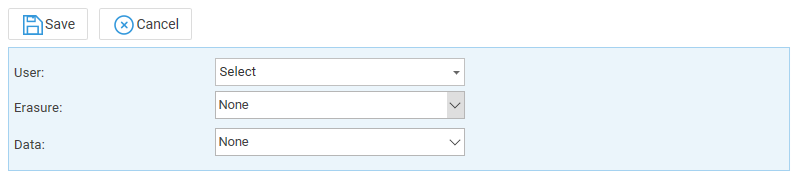
Click ‘Save’ and the user will be added to the list.
Step 3
You may amend a user’s rights by selecting the ‘Edit’ icon or delete the user from the list of Request Rights by selecting the ‘Delete’ icon.
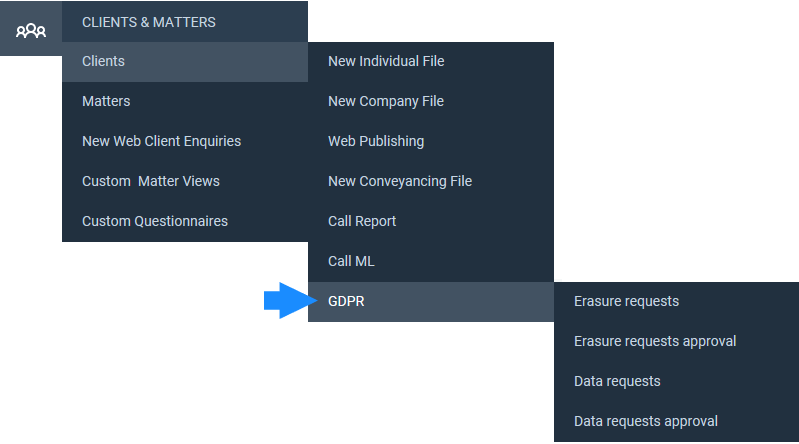
To access the GDPR options to request either a file deletion or a data request, navigate to the ‘Clients & Matters’ area, then select ‘Clients’.
You will now see an option for GDPR as shown here. Select this to bring up the options available to you.
Step 4
First, we have logged in as a requester.
We will look at ‘Erasure Requests’. After selecting the option, any existing removal requests will be displayed, as below.
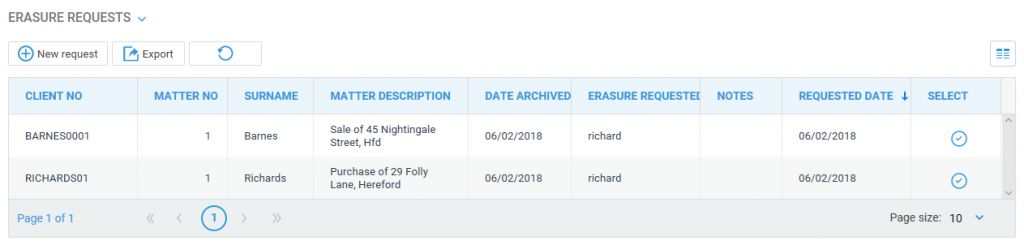
You may remove a request by clicking the ‘Select’ icon and then confirming the removal. To add a new erasure request, select the ‘New Request’ button and then select your client from the available drop-down list. Please note that you may also start typing the client number to auto-search.
Step 5
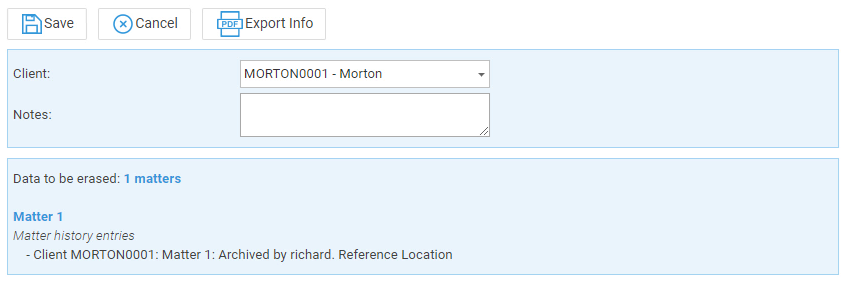
Once selected, you will be able to see how many matters will be erased.
Please note that you can only request erasure from clients whose matters are all archived.
The selected client will now be added to the list for pending data erasure. An authoriser will now be able to log into Osprey and authorise the requests.
Step 6
For the final part of this guide, we will log in as an authoriser.
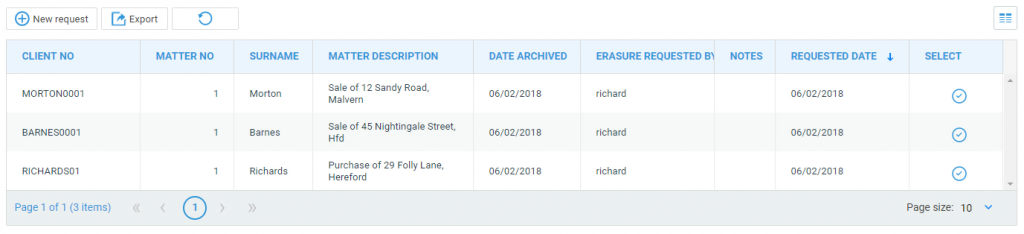
Select ‘Erasure Request Approval’ from the GDPR menu. You will now be able to see a list of erasure requests available for your approval. As an authoriser, you may also undo these if required.
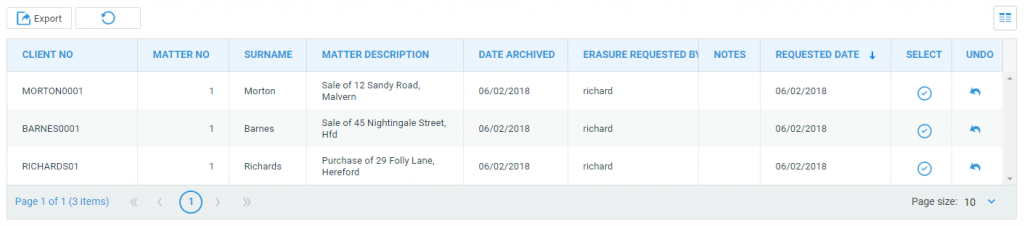
To approve a request, click the corresponding icon in the ‘Select’ column.
The message shown here will appear to advise you that the selected client and matter information will be permanently removed from Osprey Approach in 24 hours, leaving only the client & matter number available.
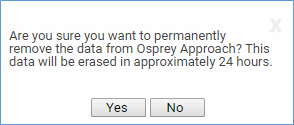
Click ‘Yes’ to confirm approval or click ‘No’ to return to the list of requests. After the 24 hour period has elapsed, the client data will no longer appear in Osprey.