Produce and print bills
Updated Feb 1st, 2022
Who is this guide for?
Accounts Users and Accounts Supervisors
The billing process in Osprey Approach allows you to post, produce and then print your bills. This guide will take you through the full billing process.
Posting a bill
Step 1
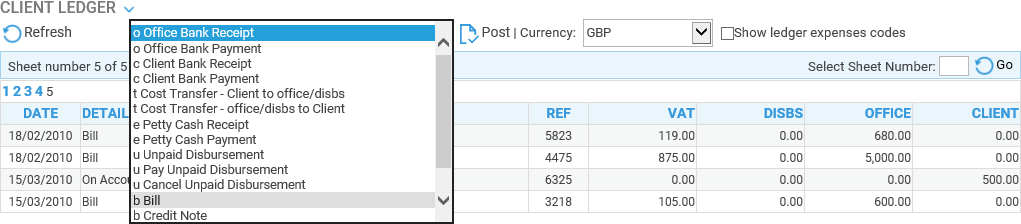
First, we will post a bill. Navigate to the Client Ledger tab and ensure that you have selected the client and matter you wish to post the bill on.
Now select ‘Bill’ from the Posting Type drop-down list, and click on Post.
One you have clicked Post, the Bill Posting window will open.
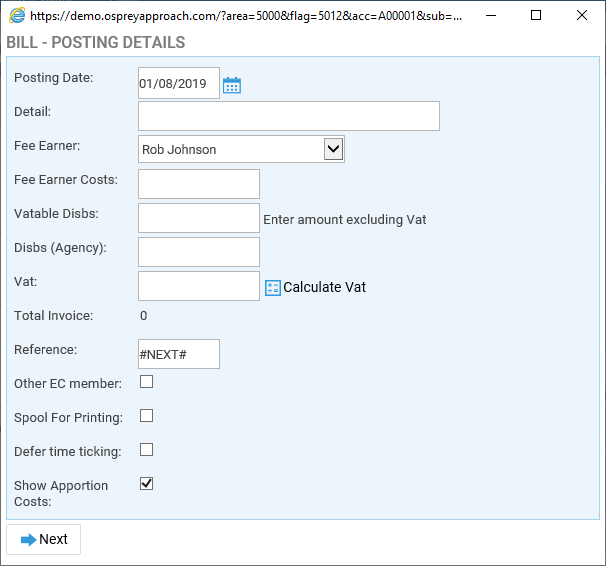
A description of the available fields is as follows:
Posting Date: The date of the bill. Please note that this must be in DD/MM/YYYY format.
Detail: Bill of Costs.
Fee Earner: This will default to the matter owner, but you can change it if you wish.
Fee Earner Costs: Use this for any fee earner costs incurred e.g. 500.00.
Vatable Disbs: Enter the net total of any vatable disbursements incurred by the client.
Disbs (Agency): Enter the total of any non-vatable disbursements incurred by the client.
VAT: The total of VAT on fee earner costs and vatable disbursements – you can use the Calculate VAT button to have Osprey automatically calculate this for you.
Total Invoice: This will show you the total invoice value once the above amount fields have been filled and cannot be changed manually.
Reference: If Bill Numbering is switched on, this will contain the text #NEXT# – leave this in place if you want Osprey to automatically number your bill for you. Enter the bill number if you want to do so manually.
Other EC Member: Use this if your client is outside of the UK.
Defer Time Ticking: Tick this box if the time recording is not up to date, this will leave the bill available to tick later when all the time recording is complete – accessible from Time Recording > Tick Billed Time. Leave unticked if you want to tick the time now.
Show Apportion Costs: When ticked, this will display a further screen within the bill posting where you can split your bill costs between a number of fee earners.
Spool For Printing: Tick this if you want to generate a printable bill for the client. Bills can be printed from Time Recording > Time Billing > Print Bills – dependent on a template having been created.
Step 2
Select the Next button once you have completed this screen. The below panel will now appear if you have disbursements posted on the ledger which you have included for billing.
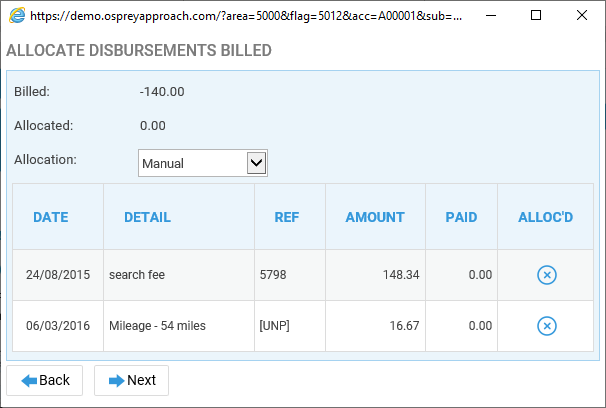
The system will ask you to allocate these against the bill. This will ensure that Osprey marks these disbursements as billed.
Click the cross in the Alloc’d column to allocate the relevant disbursements, or you can use the Allocation drop down list to select Auto Allocate, then click Go. This will then select the oldest disbursements first and allocate them automatically for you. Ensure that the Billed and Allocated figures at the top of the screen match each other and click Next.
The Time Allocation screen will now appear provided that the Defer Time Ticking box was not ticked on the first screen.
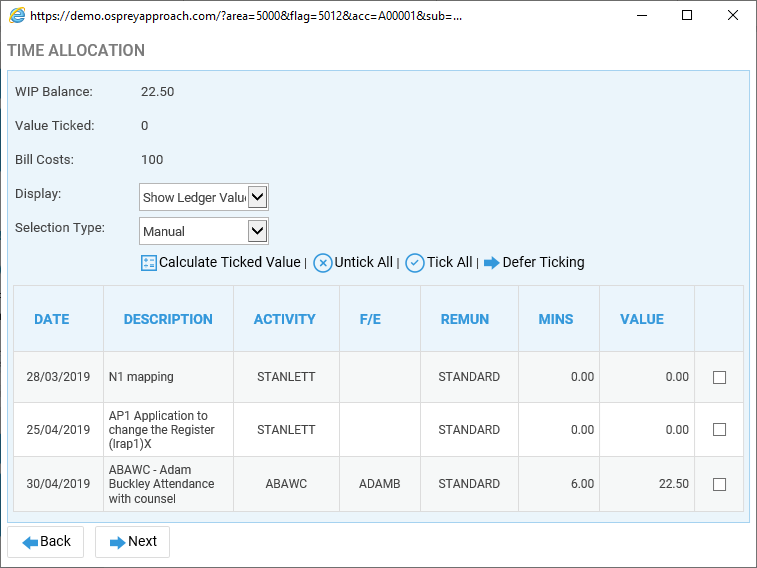
You can choose a selection type of Manual, To Date, To Value, By Fee Earner or By Remuneration Type to assist you with selecting the time to tick against the bill or you can simply tick the boxes alongside the relevant time entries to bill and use the Calculate Value Ticked box to ensure that the Value Ticked matches the Bill Costs.
If you did not select Show Apportion Costs on the first screen, click Post to post your bill.
If however you selected Show Apportion Costs on the first screen, the below screen will now appear.
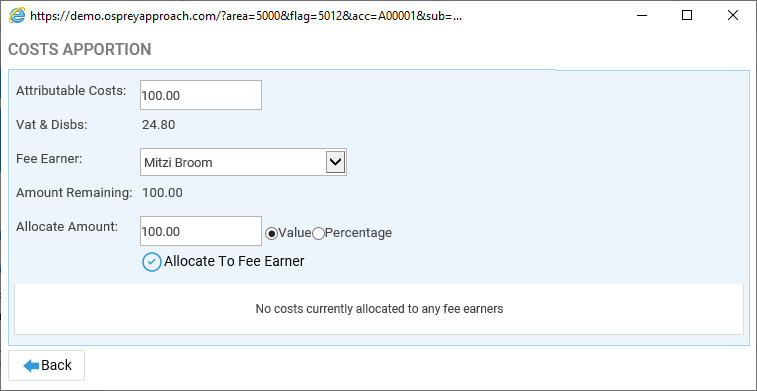
Step 3
Select the first fee earner from the drop-down list that you wish to apportion costs to, then choose between Value or Percentage.
For example, if your bill is for £500 which is attributable to 2 fee earners equally, you could select Percentage, and enter 50 in the Allocate Amount box, or you could select Value and enter 250 in the Allocate Amount box.
Click Allocate to Fee Earner when you have entered the amount, and then repeat for any additional fee earners until the Amount Remaining states 0.
Now click Post to post your bill.
Creating a Bill Template
Before printing a bill, you must ensure that a billing template has been created. We recommend booking in the Cheques, Bills and Labels training to assist you with this: https://ospreyapproach2022.wireddemo.co.uk/training/cheques-bills-labels/
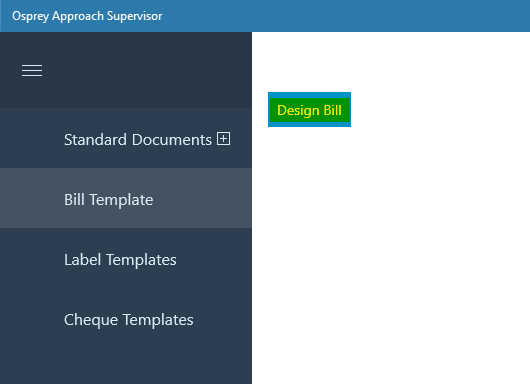
Step 1
In the Osprey Approach Supervisor App, select Bill Template.
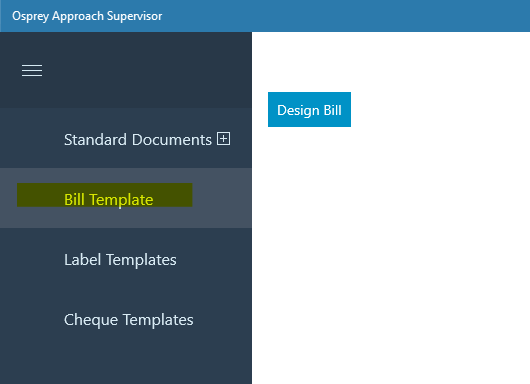
Select the Design Bill option to create or change any content on your bill template.
Step 2
When the Word document opens, you can add any information you need. A standard set of merge fields are available to allow you to include data from Osprey.
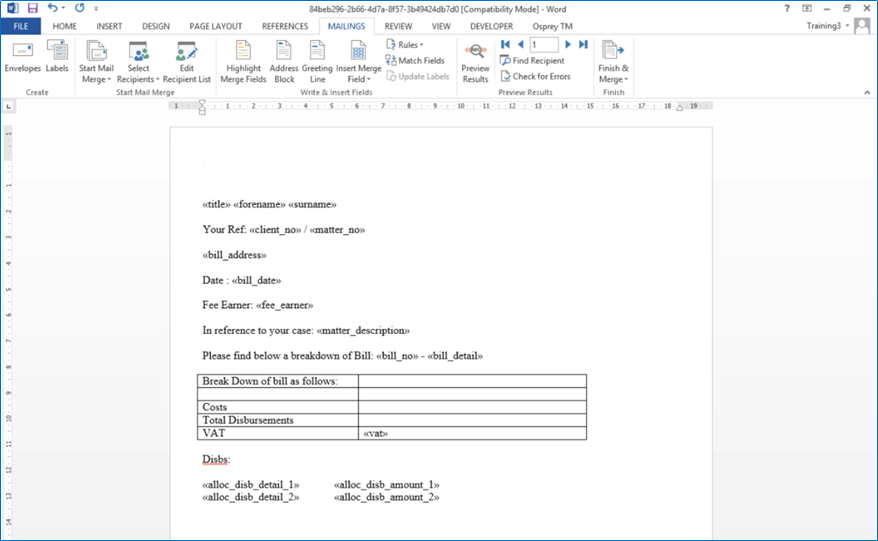
When you are happy with your template, click the X in the top corner. You can then save your changes.
Step 3
Use the Preview option to display how your bill will look when run. Please note that the preview uses dummy data to populate your bill.
Printing a bill
We will now look at printing a bill.
Step 1
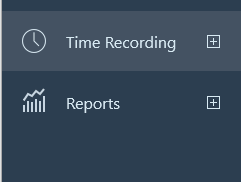
Open the Case Management App, and select Time Recording > Bill Printing:
The below screen will appear displaying any bills which have been spooled for printing. On this screen you may also save the bill into the Matter History as either a Word document or a PDF.
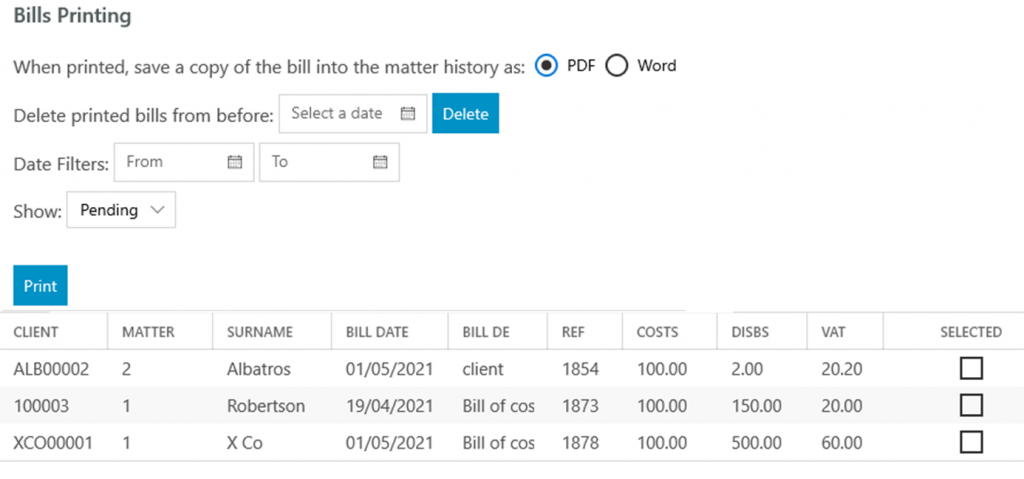
Step 2
You can now place a tick on the right hand side of any bill you wish to print.
Step 3
When you are happy with the bills selected, click Print. The bill will now open up in Word. You can now print the bill and then close Word once finished.
Should you wish to amend the bill following printing, ensure that you have saved the bill to the Matter History in Word format. You can then check this out and amend if necessary.
Paying a bill
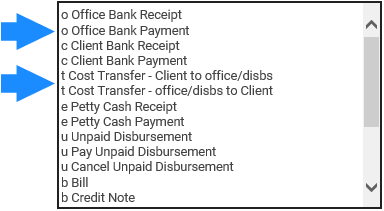
Bills are paid with either an Office Bank Payment or Cost Transfer.
After entering the payment information click Next. Osprey will then display the Allocate Credit screen – allocating a payment into office is important because Osprey then knows that the bill has been paid. If you do not allocate payments against bills, the Unpaid Bills and Aged Debtors reports will give unexpected results.
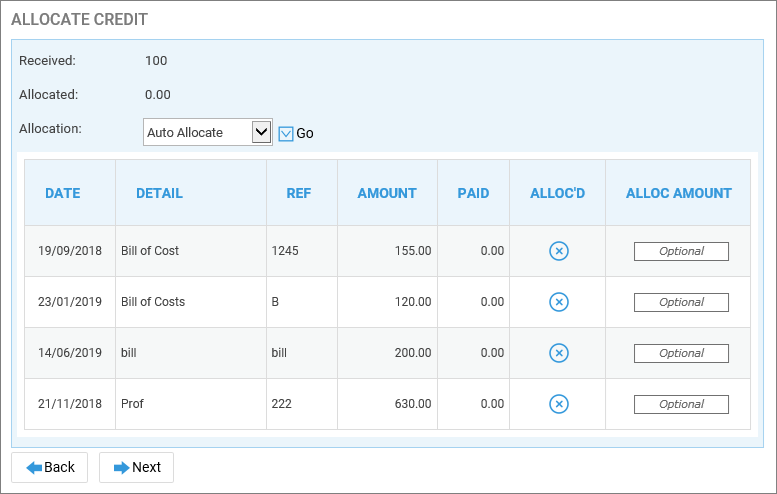
To allocate the cost transfer against the relevant bill or bills, either click the red cross against the relevant entries in the Alloc’d column or select Auto Allocate and click Go. Ensure that the Allocated and Received amounts at the top of the screen match for a fully paid bill, and click Post if you are on Standard VAT.
If you are on Cash Accounting click Next, the next screen is required to ensure that the VAT analysis is correct. Amend as necessary and click Post.