Set up Oyez Integration
Updated Mar 11th, 2021
Osprey Approach offers integration with Oyez, allowing you to run Oyez forms through Osprey Approach. To use these, a Supervisor level user will need to ensure that the integration has been set up.
Please note that you must hold an active licence with Oyez and your individual users must have the desktop version of Oyez installed with the forms library available on the local machine. You must also be using the latest version of Internet Explorer.
Configure Internet Options
Step 1
First, open Internet Explorer.
In the top right-hand corner, click the Tools icon , then select Internet Options as shown here.
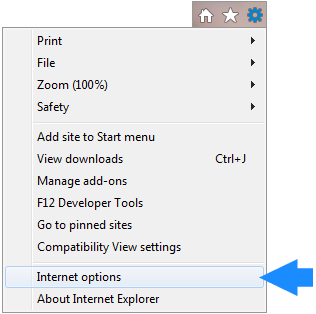
Your Internet Options panel will now appear.
Step 2
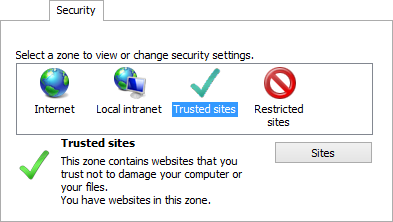
On the ‘Security’ tab, highlight ‘Trusted Sites’, and then click the ‘Sites’ button.
There will be a ‘Require Server Verification’ tick box towards the bottom of this panel. Ensure that this box is unticked.
Now place *.ospreyapproach.com in the ‘Add Website’ box and then click ‘Add’ to add Osprey to your list of trusted sites. The Trusted Sites panel should now display as follows:
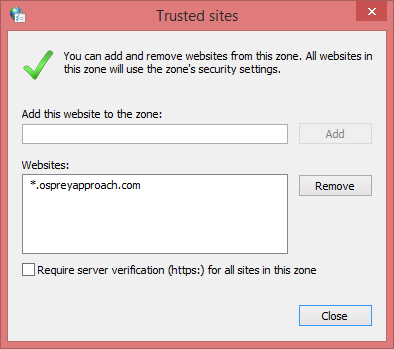
PLEASE NOTE: Your backup site will also need to be added here. Place *.ospreyapproachbackup.com in the ‘Add Website’ box and then click ‘Add’ to add your Osprey backup to your list of trusted sites.
Step 3
Select the ‘Close’ button to return to the Internet Options panel. Toward the bottom of the Security tab, there is a ‘Security Level’ area.
Select the ‘Custom Level’ button to open a new panel. Now scroll down until you come to the section called ActiveX Controls and Plug-ins.
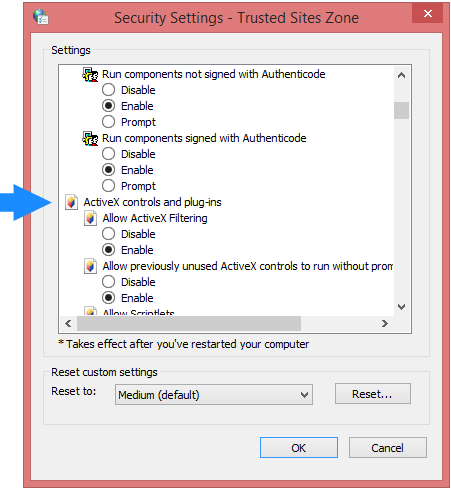
Ensure that these are set as follows:
Initialise and script Active X controls not marked as safe for scripting – Enable
Add Oyez Forms to Osprey
Step 1
To add a new Oyez form, navigate to the Supervisor area, select Case Management Setup, then click on Oyez Forms.
Now click on Add.
Please Note: You may be prompted to download the Osprey Oyez ActiveX plugin at this point. Click OK to download the file and run this as an administrator.
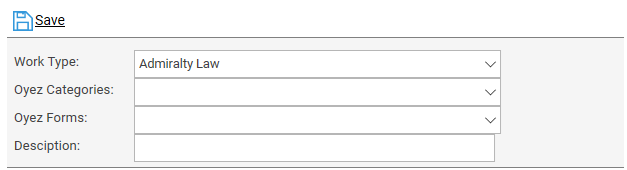
Step 2
Select the relevant Work Type in Osprey you wish this form to be available for, then choose the Oyez Category and the relevant form. Then give the form an appropriate description.
Now click Save to add the form.
Step 3
To map the form, navigate to the Supervisor area, select Case Management Setup, then click on Oyez Forms. Now click the Fields link icon against the relevant form you wish to map
Select the field on the form you wish to map osprey data into, the area where the data is stored in osprey and then the relevant table name and field name from the lists.
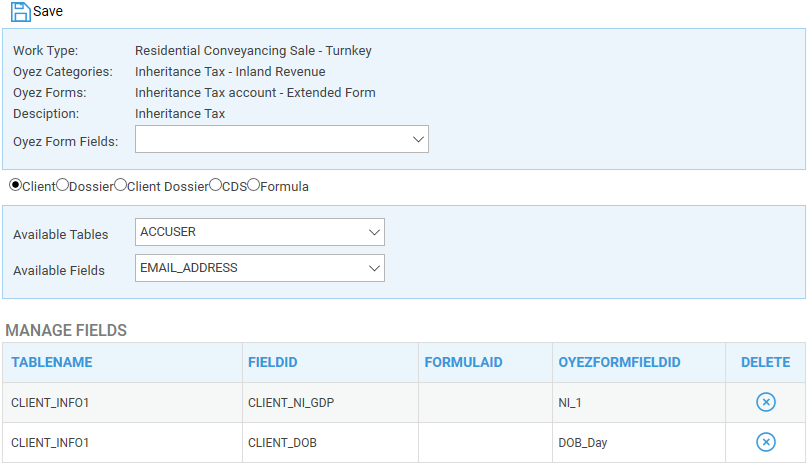
Click Save and then repeat this for all fields you wish to map
Running Oyez Forms
Step 1
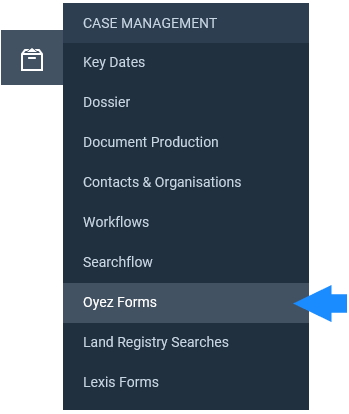
All saved forms will be available under the Case Management tab by selecting the Oyez Forms option.
Make sure you have a client/matter selected which is setup with a work type that you created a form for
Step 2
Click on the Oyez Form name.
This will run the form, merging any mapped data in the desktop copy of Oyez.
Once the form has run, make any amendments and close Oyez down in a similar fashion to Word in document production.