Set up Private Time Recording
Updated Jul 23rd, 2024
Who is this guide for?
Accounts Supervisors, Case Management Supervisors and System Supervisors
A guide describing how to set up Osprey’s time recording feature if you are intending to use time recording on your private matters
This guide explains how to set up Osprey’s time recording feature if you have never used it before. Legal Aid time recording is set up by default, but if you are intending to use time recording on your private matters, you will need to set it up first.
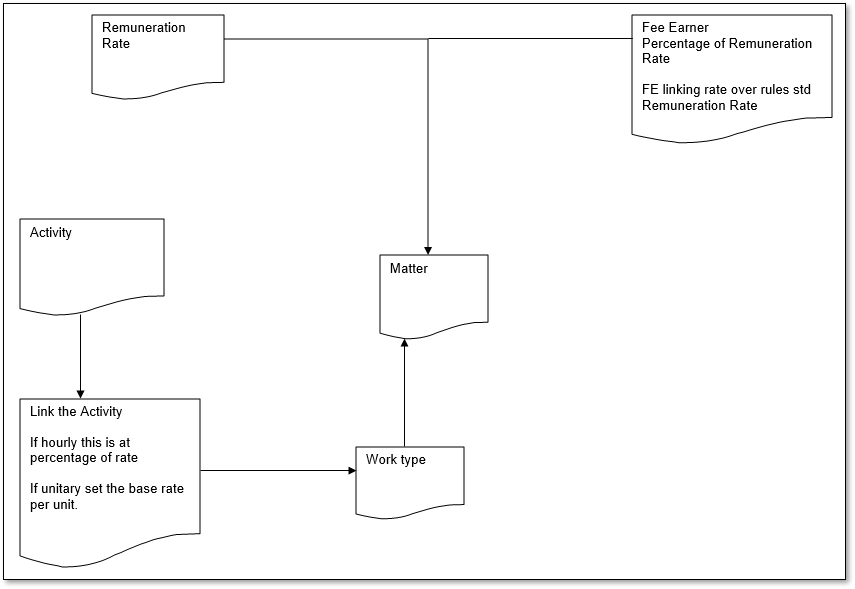
Below is an diagram of how Osprey calculates the rates for the matter – Fee earners are linked to a remuneration rate (e.g. £200/per hour), and the activity is linked to the worktype~
(e.g. travelling is calculated 50% of the fee earner’s hourly rate).
Using the above rates, if the fee earner records 1 unit of time for travelling, it will be 1 unit of (£200/2) = £10.
Choosing your Style of Time Recording
Firstly, we will need to decide how to time record. Osprey allows three different methods of recording your time entries.
- Navigate to Supervisor > System Setup > System Settings.
- Click Edit.
- Scroll down if required to the settings for Time Units and Time Type:
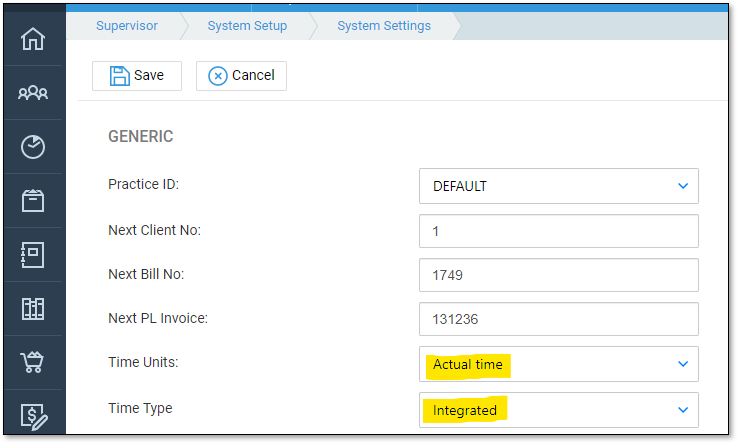
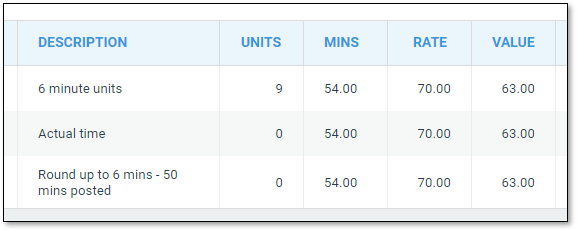
The Time Units setting gives you three options:
- Actual Time – Use this if you want your fee earners to record their time as the actual number of hours/minutes that they spent on the work.
- 6 Minute Units – Use this if you want to record time in 6 minute units e.g. fee earner enters 1 for 6 minutes, 2 for 12 minutes etc.
- Round up to 6 mins – Use this if you want to record in actual time, but have the system automatically round the value up to the nearest 6 minutes of time. E.g. fee earner enters 5 minutes – system records 6 minutes, fee earner enters 13 minutes – system records 18 minutes.
The Time Type option gives you 2 options:
- Integrated – Use this option if you wish to incorporate your time when billing your clients. When a bill is posted to the client ledger, the system will ask you which time entries you want to bill. The time will then be removed from the list of WIP and placed into the Billed Time area of Osprey.
- Non-Integrated – Use this option if you do not wish to incorporate your time when billing your clients. Any time recorded will then need to be written off prior to archiving the matter.
Add your Activity Codes
If you need to add additional activity codes, the link below will assist.
Adding Work Types
Activity codes are linked to Work Types, allowing a different set of activities to be available for different areas of law. If you require a new Work Type to be created, please view the below guide.
Linking Activity Codes to Work Types
- Navigate to Supervisor > Code Setup > Work Types.
- Alongside the Work Type you wish to link Activity Codes to, click the Link Activity Code button:

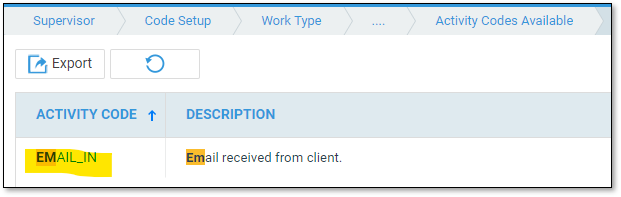
- Locate the Activity Code you wish to link and click the Activity ID to link it:
Choose a Rate Type. This can be Hourly or Unitary. If you chose to record time in 6 Minute Units earlier, time will still be recorded in units even if you select Hourly here. Choose:
- Hourly – if you want all fee earners to charge the same set percentage of their Hourly Rate for this activity.
- Unitary – if you want all fee earners to charge the same amount for this activity.
e.g. 1 – Choosing 100 in the Percentage/Unit Rate box, and Hourly in the Rate Type means that each fee earner will charge 100% of their hourly rate per hour for this activity.
e.g. 2 – Choosing 15 in the Percentage/Unit Rate box, and Unitary in the Rate Type means that every fee earner will charge £15 per unit for this activity.
e.g. 3 – Choosing 50 in the Percentage/Unit Rate box, and Hourly in the Rate Type means that each fee earner will charge 50% of their hourly rate per hour for this activity – sometimes used for Letters In.
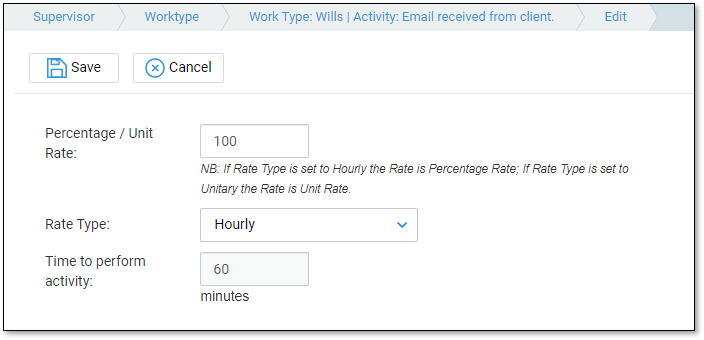
Click Save when you are done. Repeat for each Activity Code you want to link to the work type.
Adding Additional Remuneration Types
The below link will show you how to add Remuneration types if required.
https://support.ospreyapproach.com/guides/adding-remuneration-types/
Linking and Updating Fee Earners’ Charging Rates (Remuneration Types)
If the majority of your fee earners charge £150 per hour for this Remuneration Type, but there are one or two who have a different hourly rate, we can link these fee earners to charge a different rate to the £150 default.
Navigate to Supervisor > Code Setup > Fee Earners.
Click the Link Rem Type button alongside the Fee Earner you would like to set a different charging rate for.

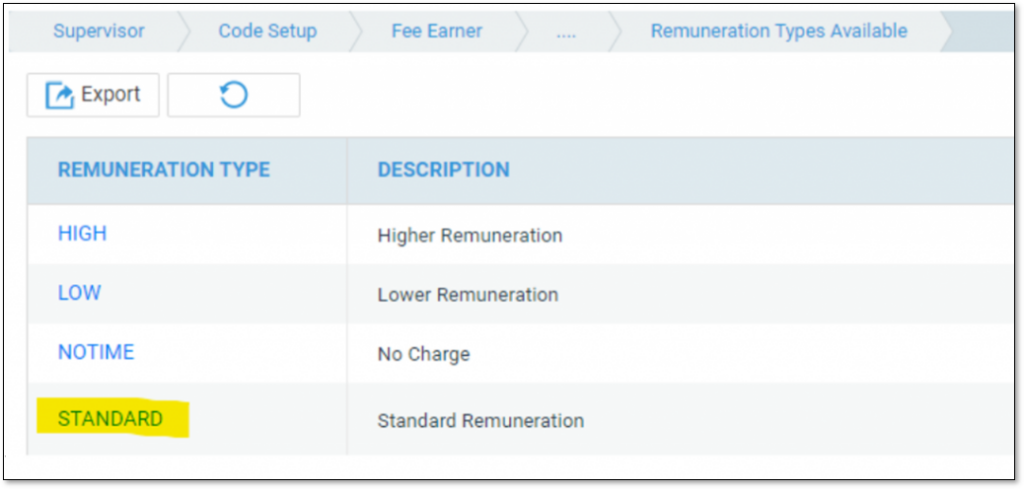
Click the Remuneration ID that you want to set the new fee earner rate for:
And now enter the rate that this fee earner should charge when working on matters set for this remuneration type:
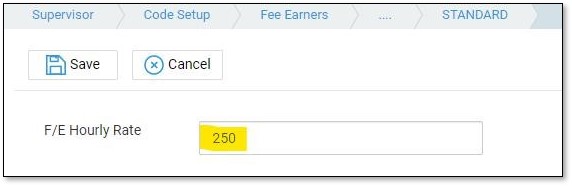
Save your changes.
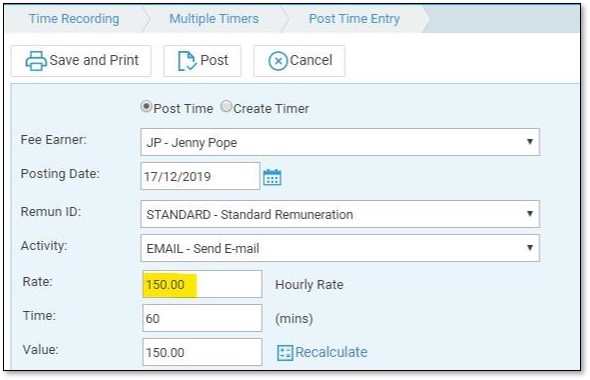
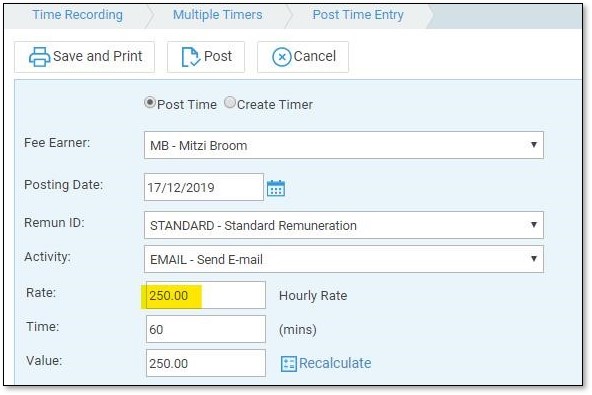
So now, although the STANDARD remuneration is set at £150 per hour, when f/e MB records time using this remuneration, the rate will be £250:
Fee Earner JP is not linked to the STANDARD remuneration type, so is charging the default amount per hour: